How to Run Windows 11 on a Mac (And Why You Might Want To)
Run Windows on your Mac computer
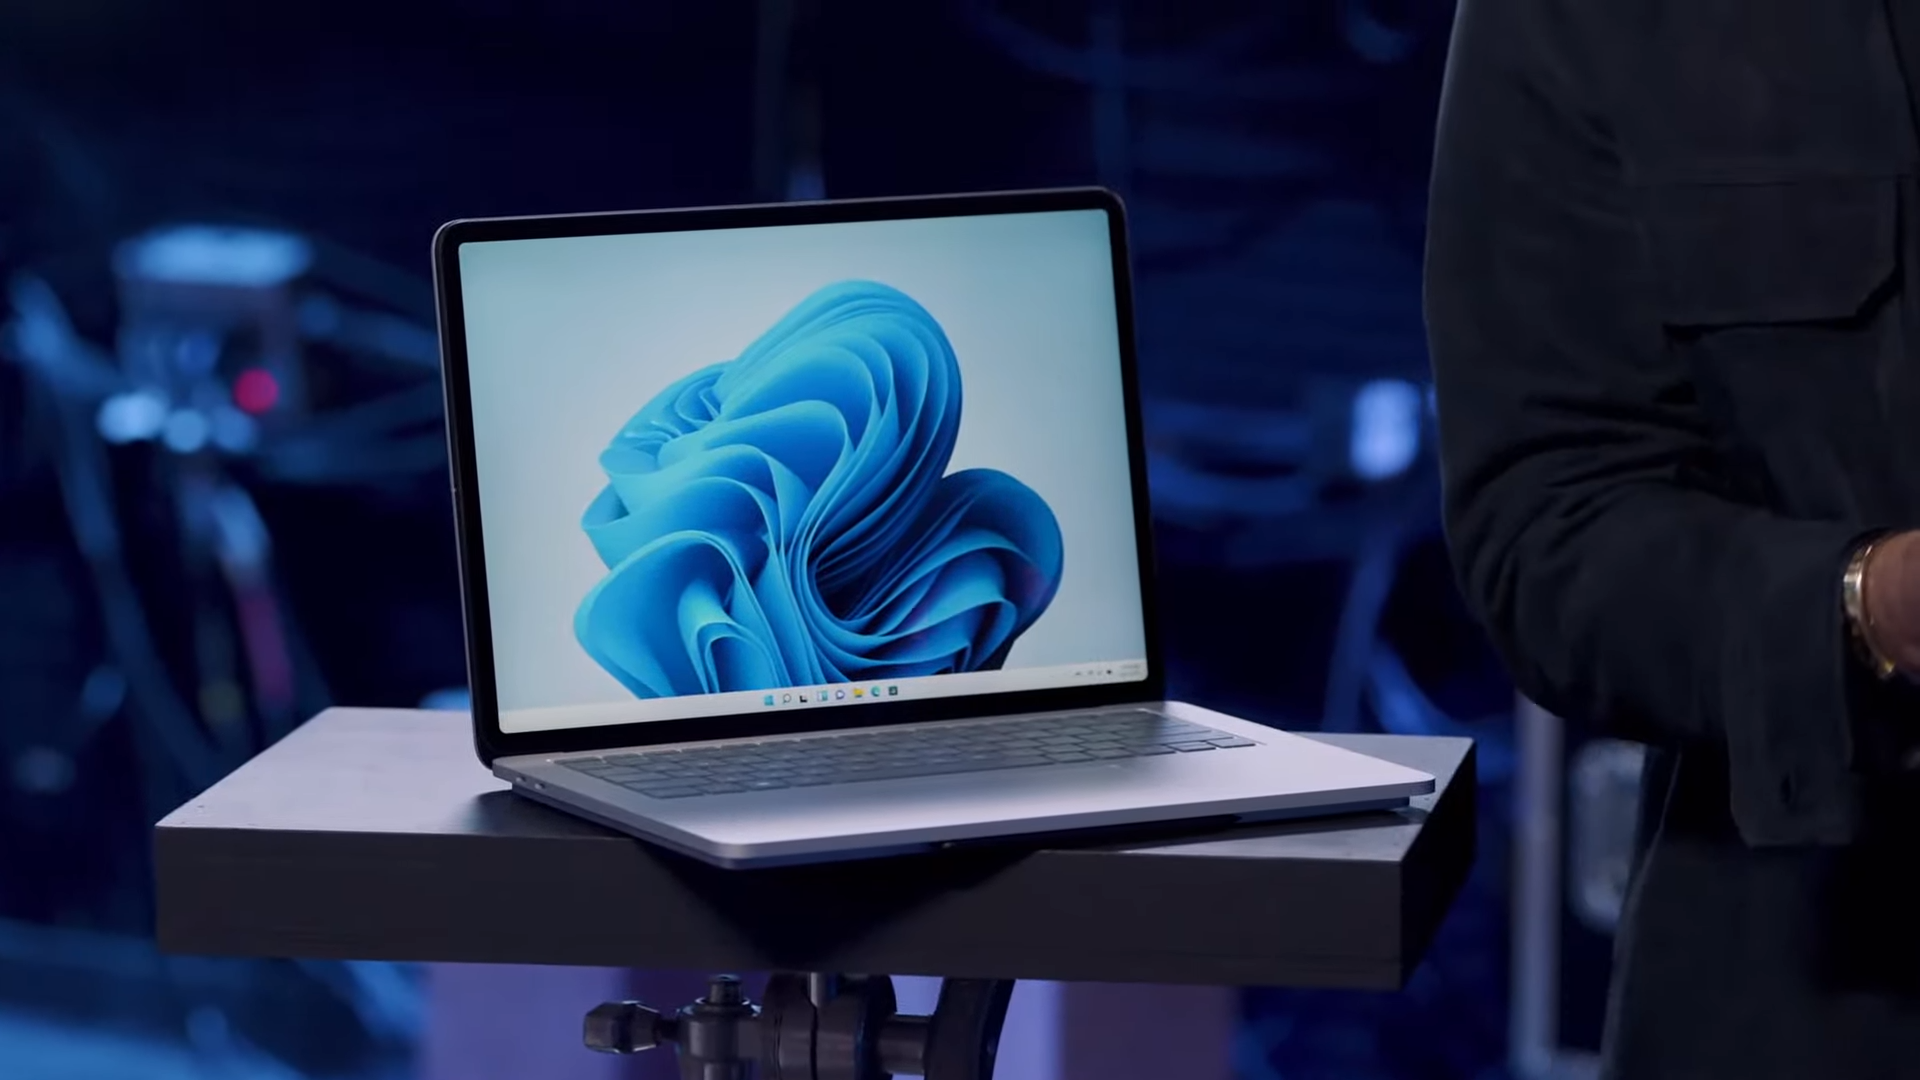
While we’ve long since reached parity in the operating system wars, and today’s choices are mostly a matter of personal preference, there does come a time when one operating system is simply a better choice than the other. Running a Windows-only application, for example, is often a requirement for a job or school, and an alternative that runs on macOS simply won’t cut it.
Luckily, there’s always virtualization. Because why choose an operating system when you can run them all?
Why You Should Run Windows 11 on Mac
As we have said above, there are plenty of reasons why you may want to install Windows 11 on a Mac computer. However, there are some common reasons why people often do it. Below are the three top reasons for you to install Windows 11 on your Mac.
- To Run Windows-Exclusive Software: Some programs, especially computer games, are released exclusively for specific operating systems. In some instances, you can use third-party applications to force these programs to work on a Mac. However, if that is impossible, installing Windows 11 on your Mac may be the only option.
- Get a Feel of the Other Side of the Fence: If you have spent your whole life using a Mac computer, then pretty sure you will sooner or later get curious to know how a Windows computer feels like. Installing a virtual Windows 11 on your Mac computer is a cheaper and easier alternative than buying a new computer just to test the Windows operating system.
- Test Your Program’s Windows Compatibility: This one mainly applies to software developers. Plenty of software developers prefer working on a Mac rather than a Windows computer. However, a problem occurs when it is time to test their programs on a Windows 11 OS. By installing a virtual Windows 11 on your Mac, you can test your software’s compatibility with Windows as much as you want.
What Is Virtualization?
There are several ways you can run other operating systems on a Mac computer. However, today we will focus solely on using virtualization to run Windows 11 on a Mac. Virtualization is the process of running an operating system within another running system.
Unlike with Dual Booting, where your computer will be alternating between two different OS, Virtualization is a program that emulates an OS while the original OS is running the former. In other words, it is macOS that will be running the program that emulates Windows 11.
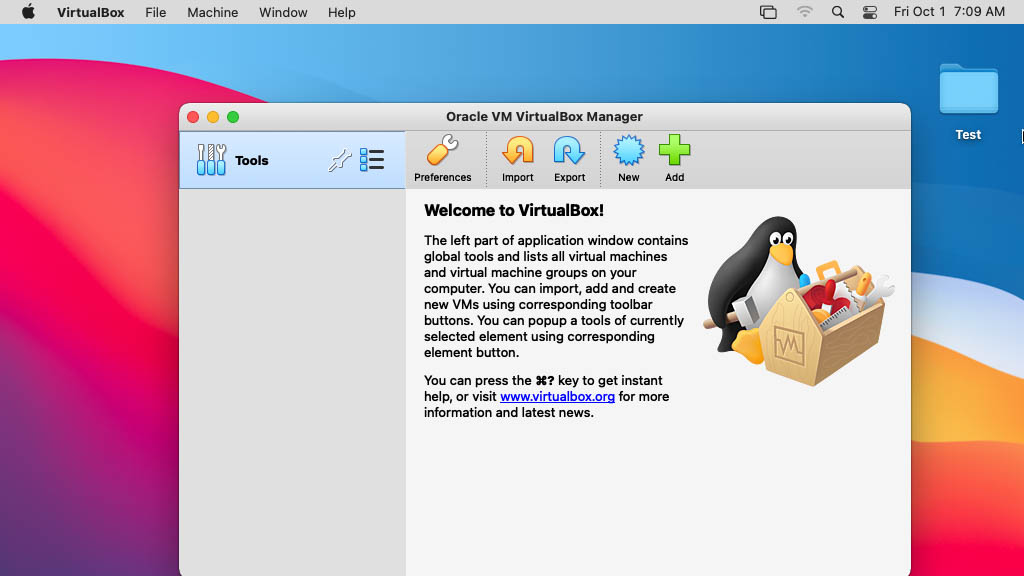
There are many virtualization tools that you can download, such as VMWare Fusion, Parallels Desktop, and VirtualBox. In this article, we will be using Virtual Box for our virtualization. Oracle developed VirtualBox to provide free and open-source hosted hypervisor for virtualization.
Things You Need to Run Windows 11 on a Mac
To get started in installing Windows 11 on your Virtualbox Virtual Machine, make sure that you have the following:
Sign up to receive The Snapshot, a free special dispatch from Laptop Mag, in your inbox.
- Microsoft 11 ISO Image: You can download it here. You will need a Microsoft Account that is a member of the Windows Insider program.
- Oracle VM VirtualBox installer: You can download it here.
- A Microsoft 11 compatible Mac computer (in terms of technical requirements)
- Processor: 1 gigahertz (GHz)
- RAM: 4 gigabytes (GB)
- Storage: 64 GB
Take note that these are the minimum requirements to run Windows 11. This means that you will need more than or at least double of these values for your Mac to run the Windows 11 virtualization smoothly. This is because your Mac computer will continue to run other background processes while you are running VirtualBox.
How to Install Windows 11 on VirtualBox Virtual Machine
If you have completed the checklist above, it is time for us to get to the central part of this article. Here are the steps you need to take to get Windows 11 working on your Mac computer.
1) Install VirtualBox using the installer that you downloaded from above. Follow the instructions shown in the installer. Using the default settings provided should be enough for our needs.
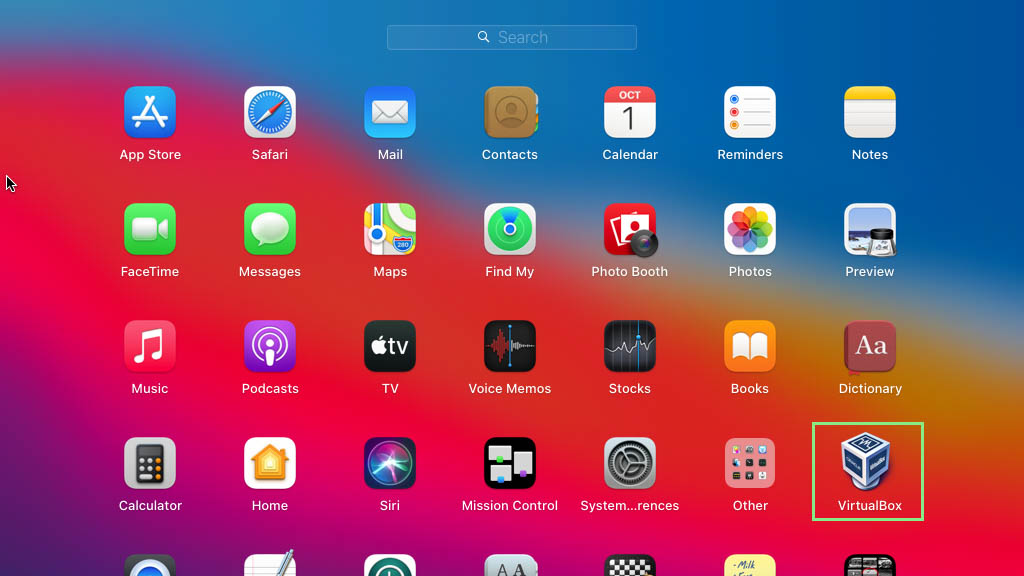
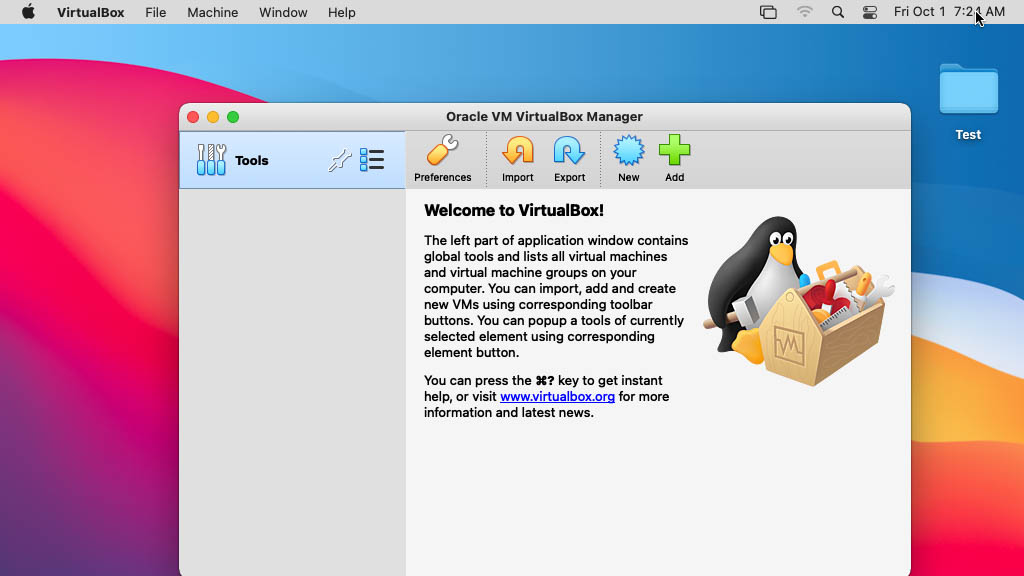
2) Open the Virtualbox by clicking on its icon on your Dock or Launchpad.
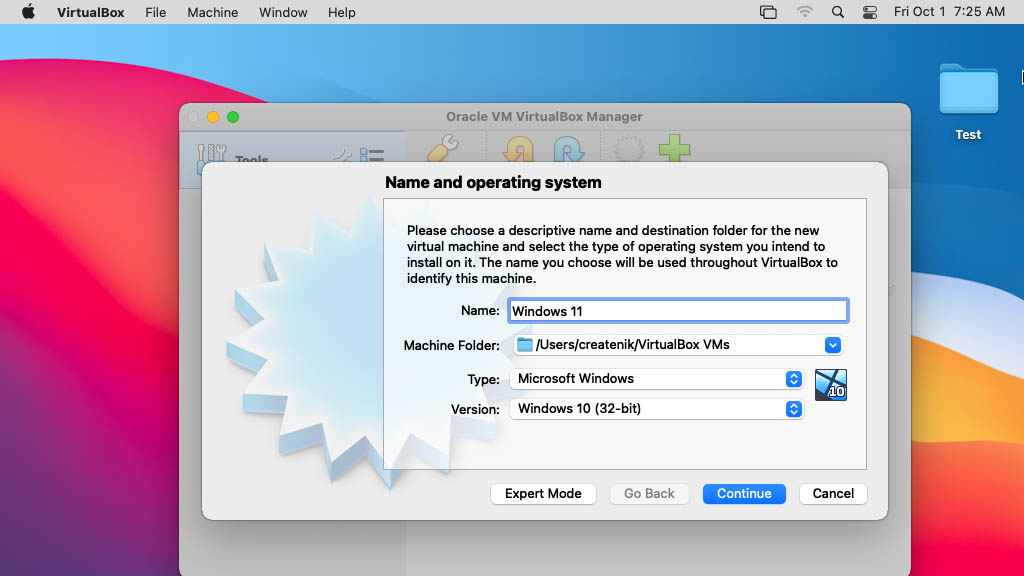
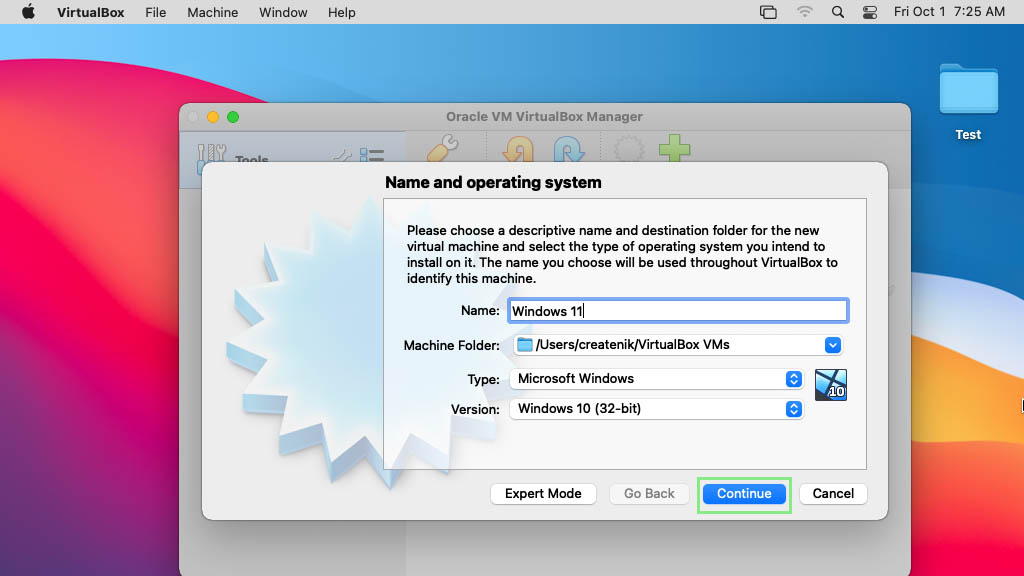
3) On the menu bar at the top of the window, click the New button. This will open a second window where you can enter the name of your new virtual machine, the virtual machine’s storage location, its type, and, finally, its version.
4) From the window above, type your preferred name for your virtual machine. Leave the Machine Folder in default. Afterward, select Microsoft Windows as the Type and Windows 10 (64-bit) as the version.
5) Click the Next button at the bottom of the window.
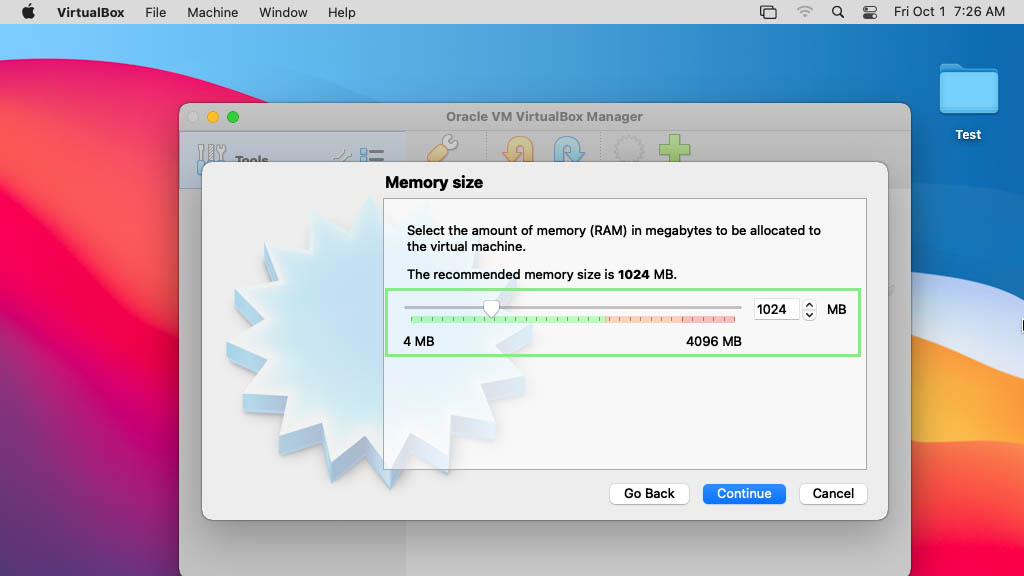
6) In the next stage, you will be required to select your preferred memory allocation for your virtual machine. Drag the slider to your preferred memory size or type in the value into the field on the right. Although Windows 11’s minimum memory requirement is only 1Gb, we recommend that you set this to at least 4Gb or 4096 Mb.
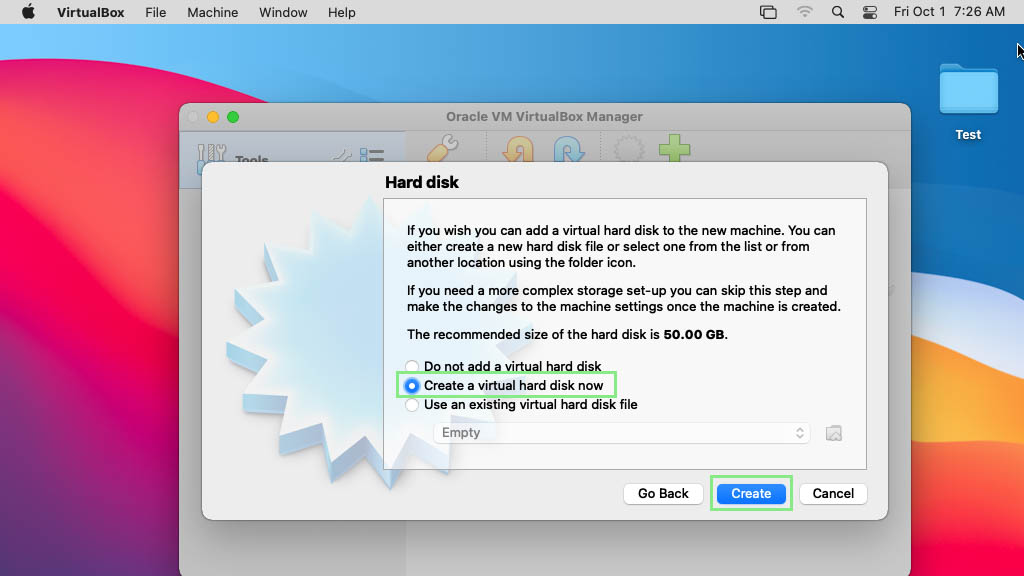
7) Once you are in the Hard disk step, select Create a virtual hard disk and click Create.
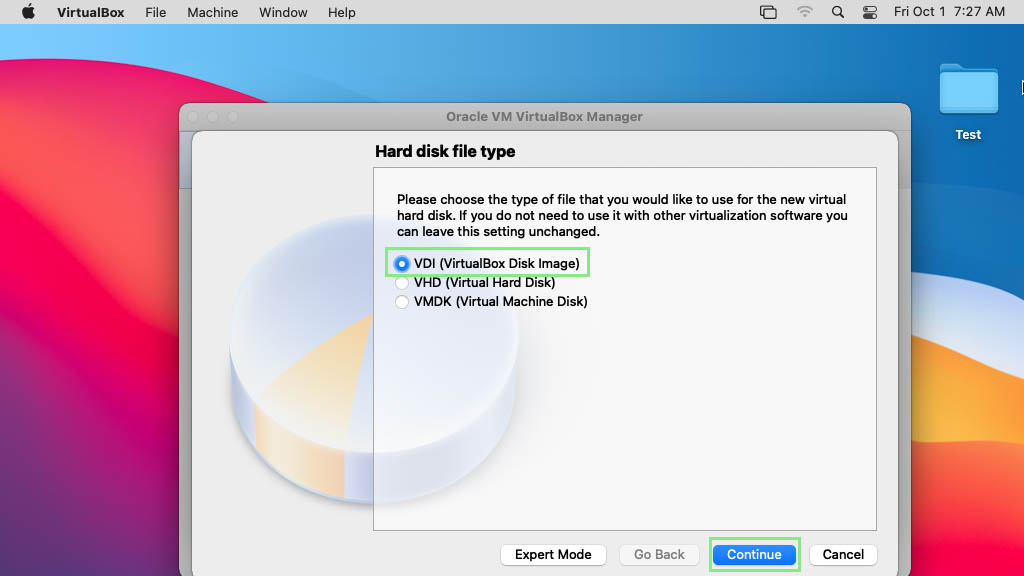
8) Select VDI (Virtualbox Disk Image) as the Hard disk file type on the next window, then click Next.
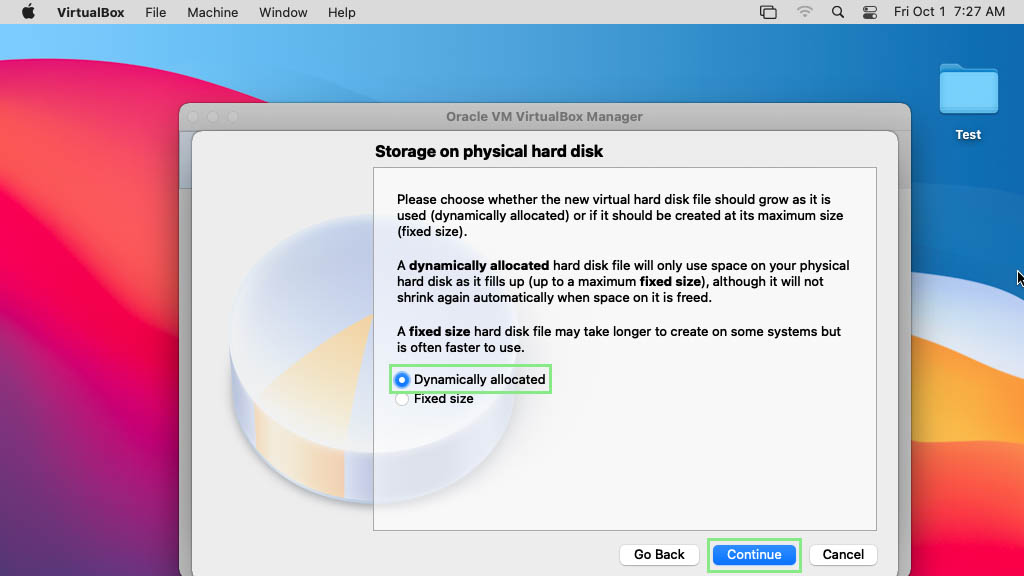
9) Set Storage on a physical hard drive as Dynamically allocated. Click Next.
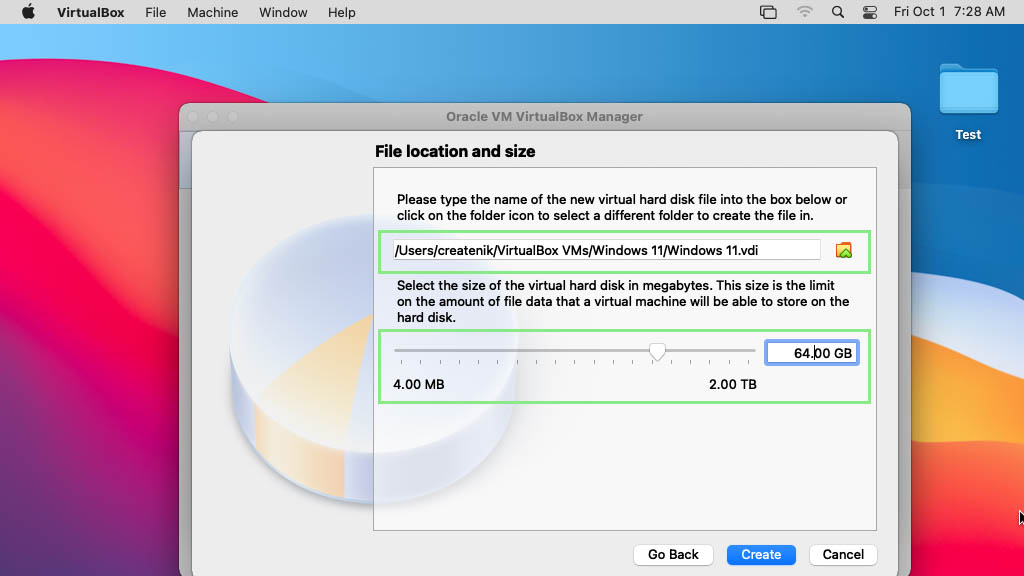
10) Next, select where you want your virtual machine to be saved and the maximum size that it can take up in your Mac computer. Remember that Windows 11 requires at least 64Gb to function.
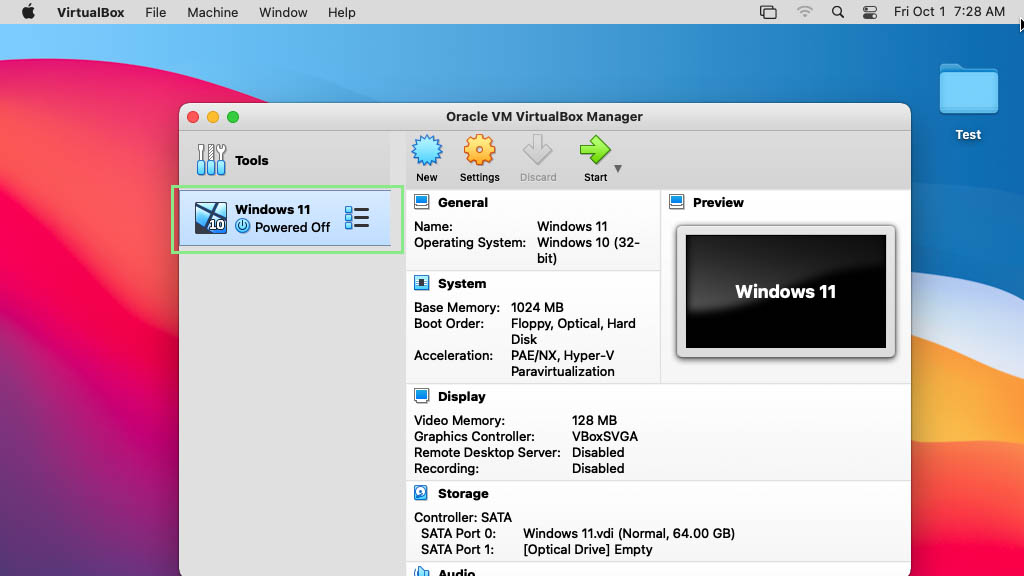
11) Click Create. After a short period of loading, a new virtual machine should be listed on the left side of VirtualBox Manager.
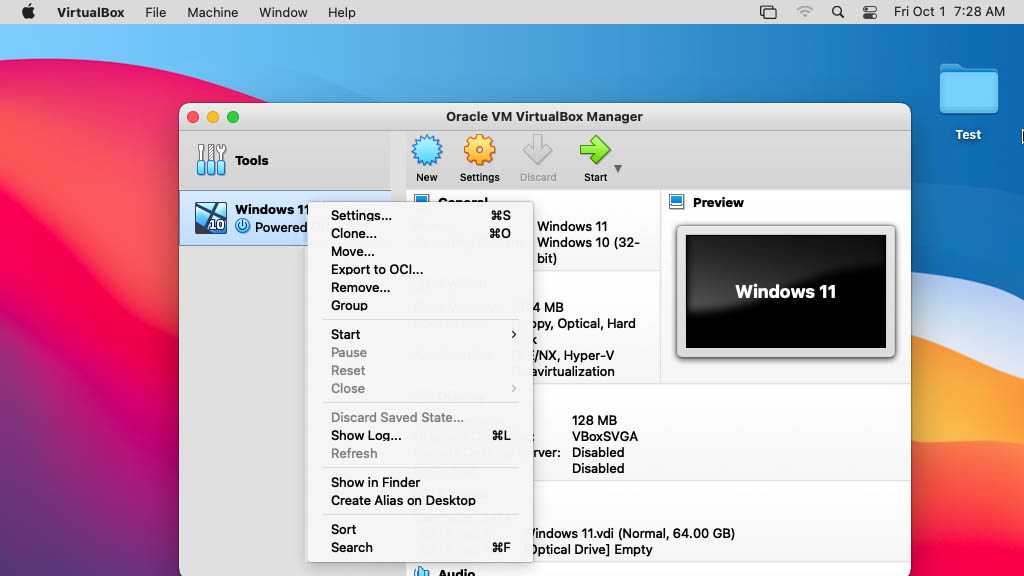
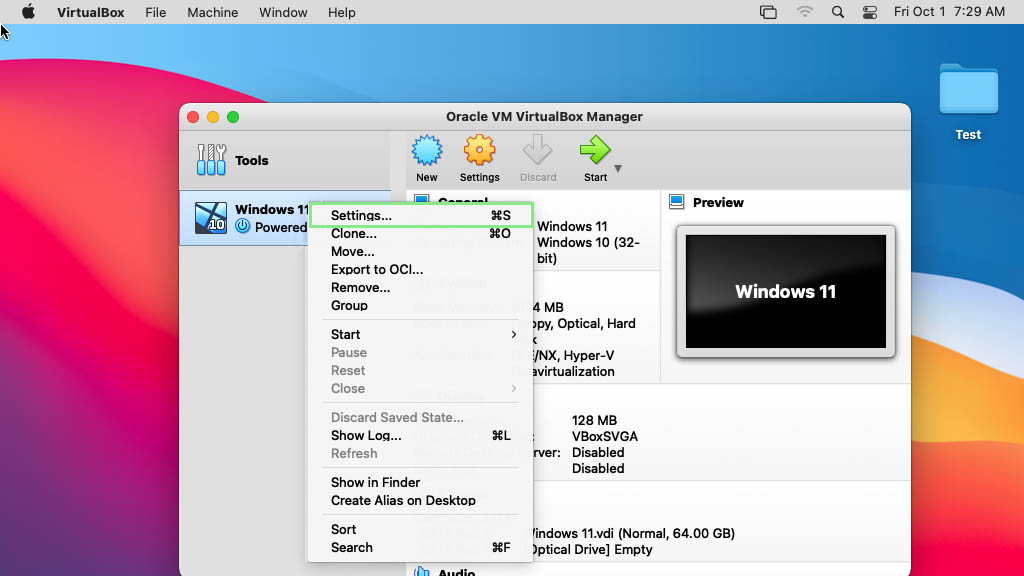
12) The following few stages would be necessary for setting up your virtual machine to run on Windows 11. First, right-click the name of your newly created virtual machine.
13) Select Settings from the dropdown. This will open the Settings window for your new virtual machine.
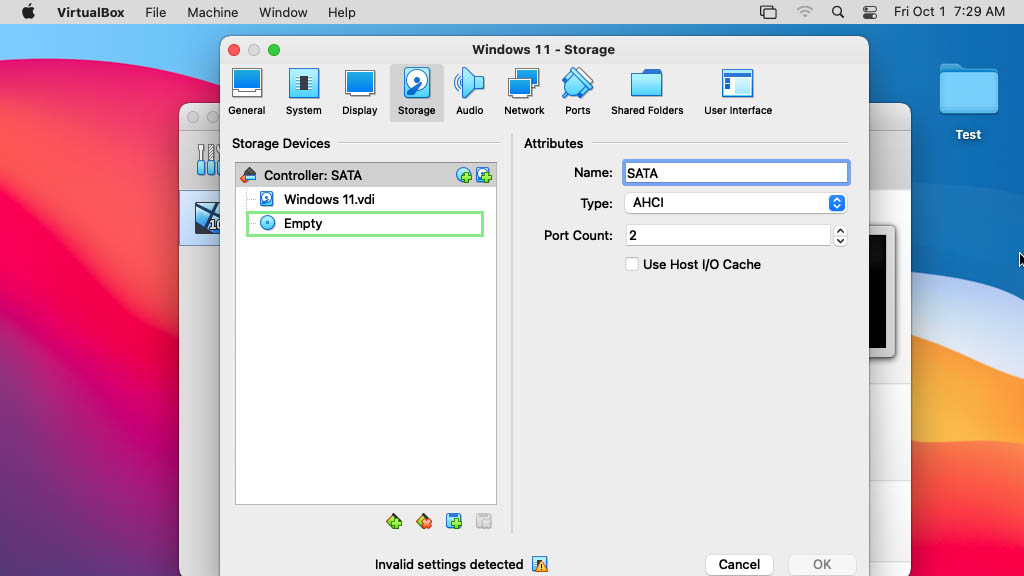
14) Go to the Storage tab and click the Empty disk under the Storage Devices section.
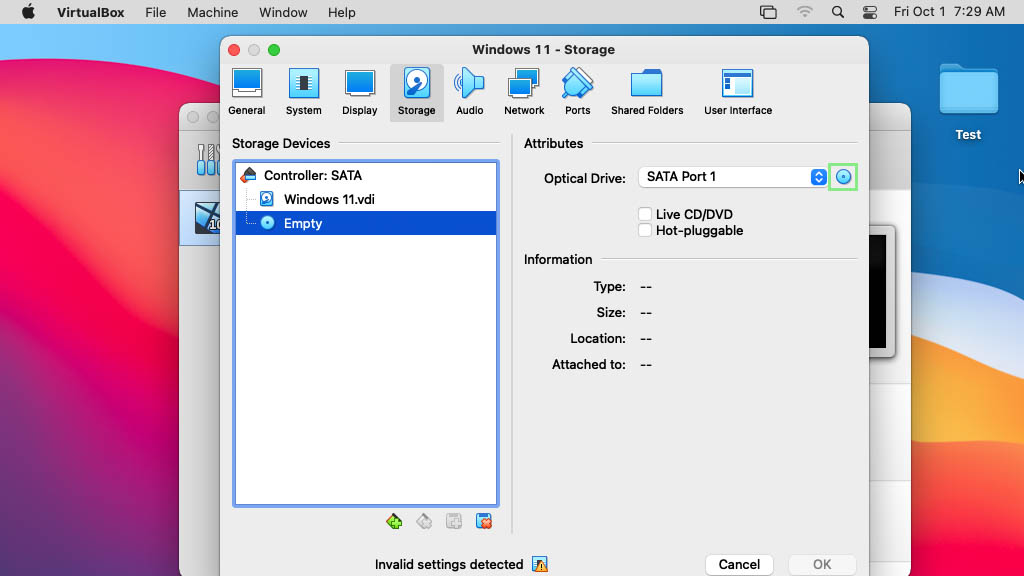
15) On the right side of the screen, you should see the Attributes section. Click the CD icon beside the Optical Drive dropdown.
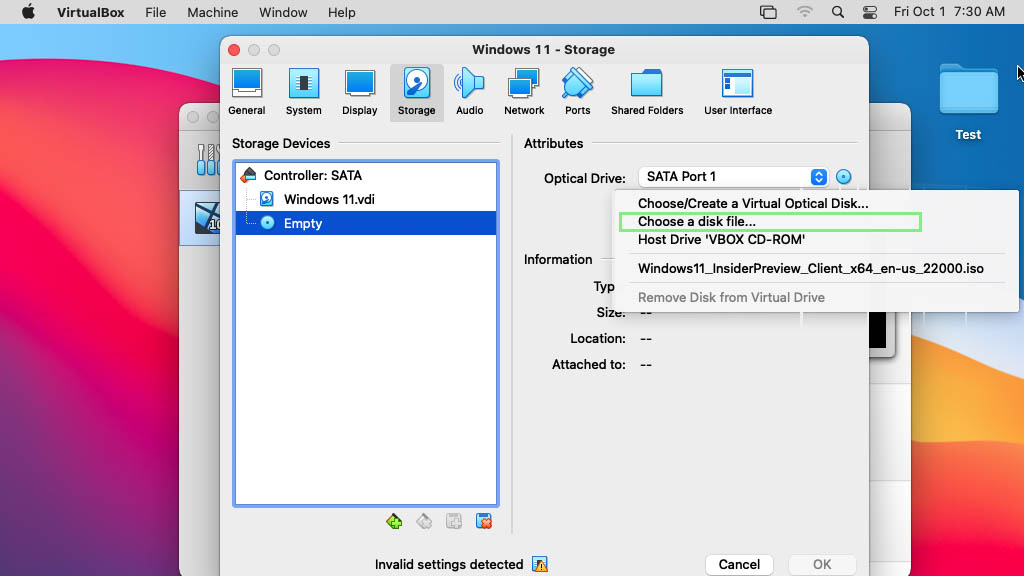
16) Select Choose a disk file.
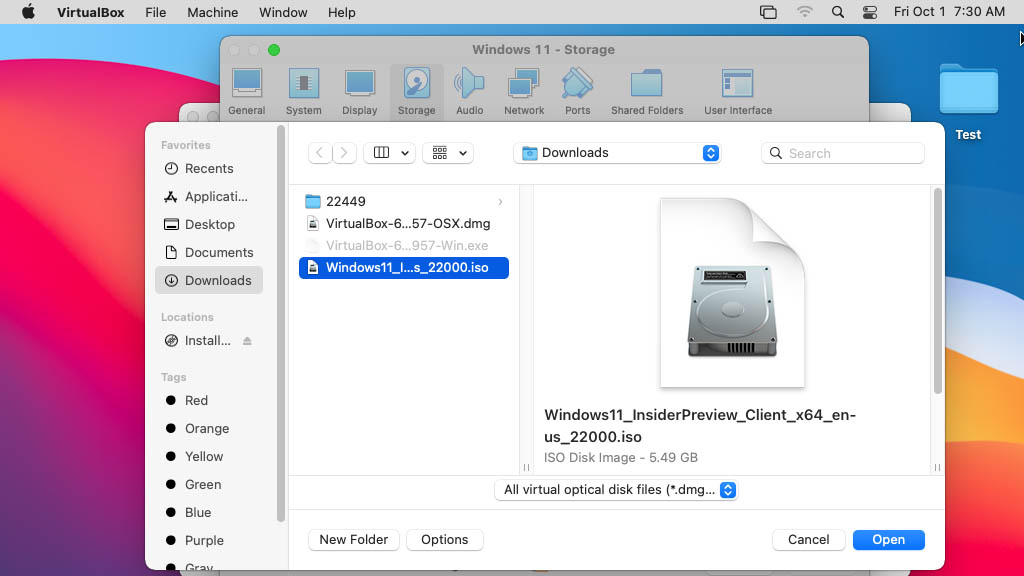
17) On the opened window, navigate and find the Windows 11 ISO image that you previously downloaded.
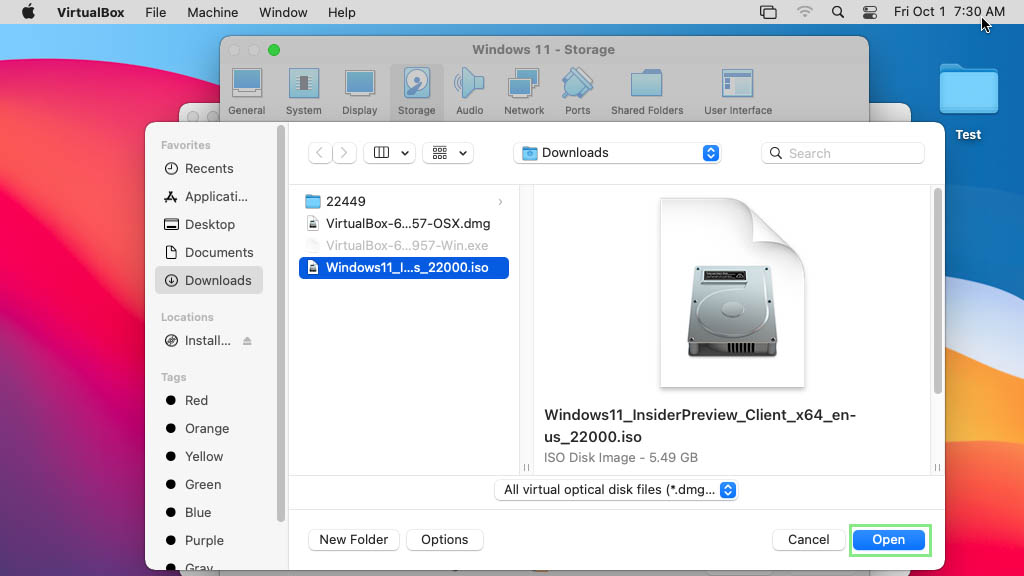
18) Select the ISO image and click Open. Wait for your virtual machine to load, and that’s it. Your Windows 11 virtual machine is ready to use.
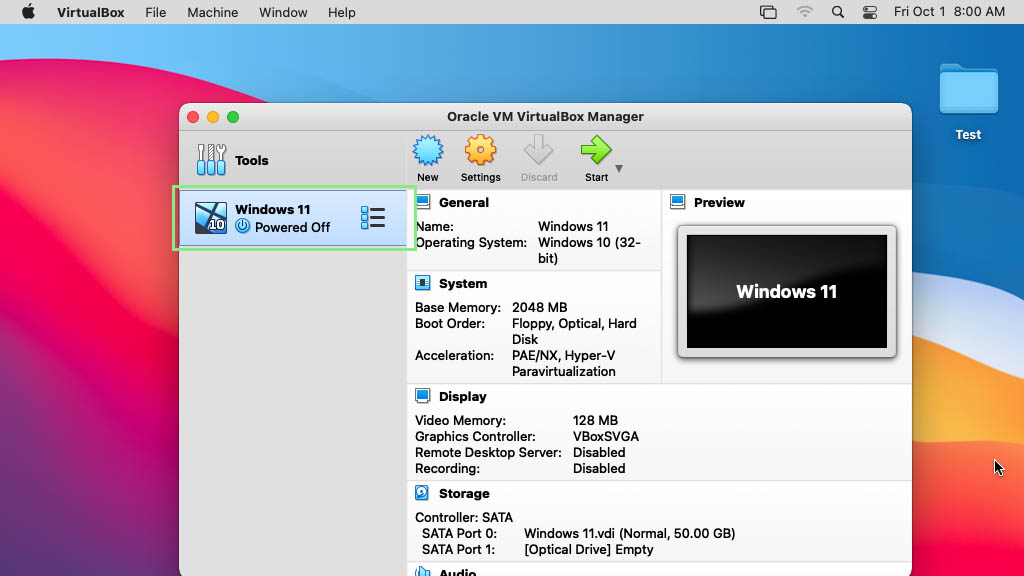
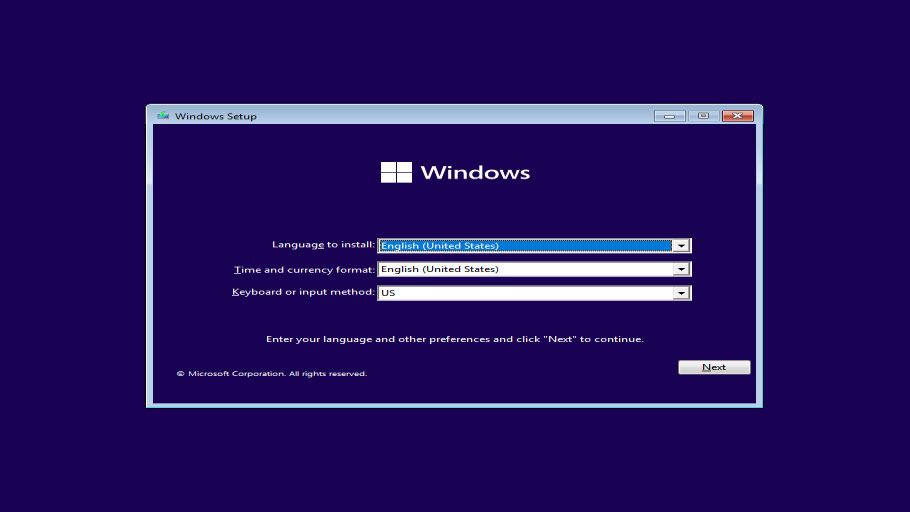
19) To run your virtual machine, go back to VirtualBox’s main screen and double-click its name. This should open a screen that has a Windows loading screen.
20) Follow the instructions to set your preferences and other settings.
Bryan covers everything you need to know about Windows, social media, and the internet at large for Laptop Mag. Thanks to his extensive knowledge of operating systems and some of the most popular software out there, Bryan has written hundreds of helpful guides, including tips related to Windows 11 drivers, upgrading to a newer version of the OS, editing in Microsoft Photos, or rearranging pages in Google Docs.

