How to disable AutoPlay in Windows 11
AutoPlay is a hit-or-miss feature that you may want to turn off
Sign up to receive The Snapshot, a free special dispatch from Laptop Mag, in your inbox.
You are now subscribed
Your newsletter sign-up was successful
AutoPlay is a helpful feature in Windows 11. Unfortunately, there are some instances when it is best left turned off. Whether due to lagging issues or annoyance, you can disable Windows 11’s AutoPlay feature with these few simple steps.
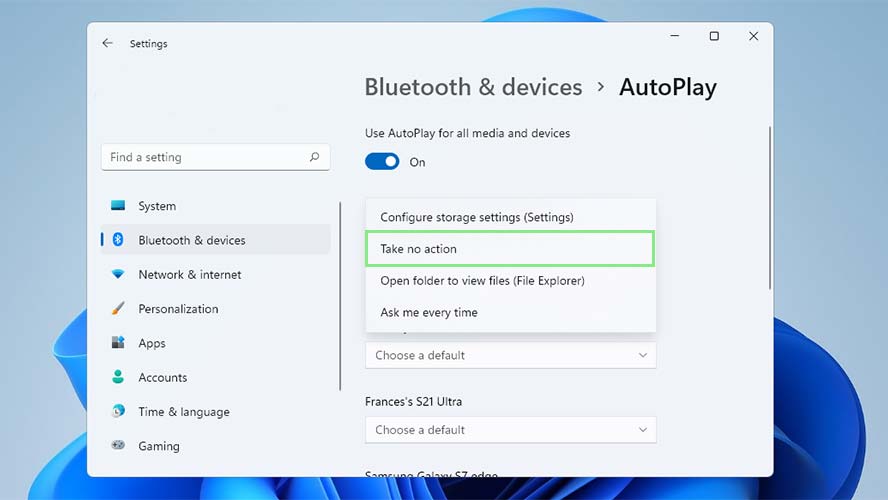
Introduced way back in Windows 98, AutoPlay is one of the most recognizable features of the Windows OS. By default, AutoPlay in Windows 11 runs every time you connect an external device, such as CDs, DVDs, or memory cards. In Settings, you can set the action that Windows 11 will take for each kind of device. These options include “Configure storage settings,” “Take no actions,” “Open folder to view files,” and “Ask me every time.”
- Windows 11 review: Is it better than Windows 10?
- How to mount and run an ISO on Windows 11
- How to connect multiple monitors on Windows 11
Sadly, for some people, AutoPlay has become annoying at best and risky at worst. There are also instances where it can cause security issues, such as when the system automatically opens virus-infected devices. Luckily, you can disable it effortlessly.
Turning off Autoplay for all devices on Windows 11
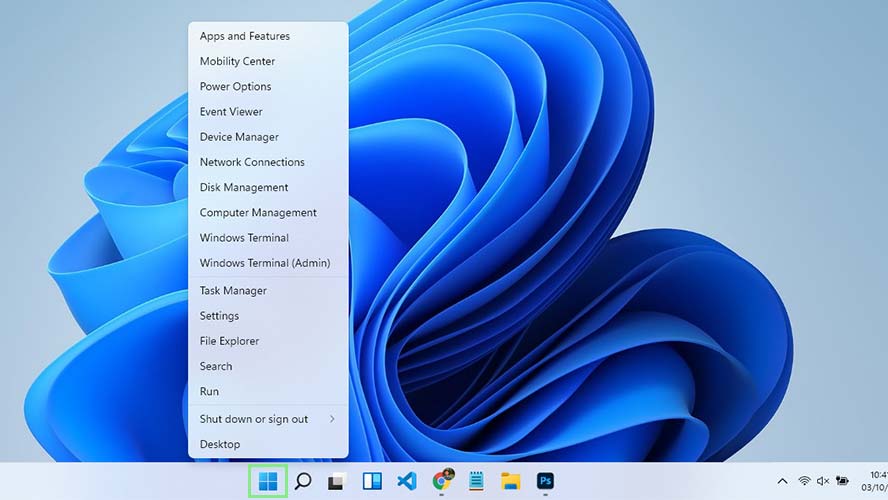
1) Turning off AutoPlay can be done on your computer’s Settings window. To access it, right-click the Start button on your taskbar.
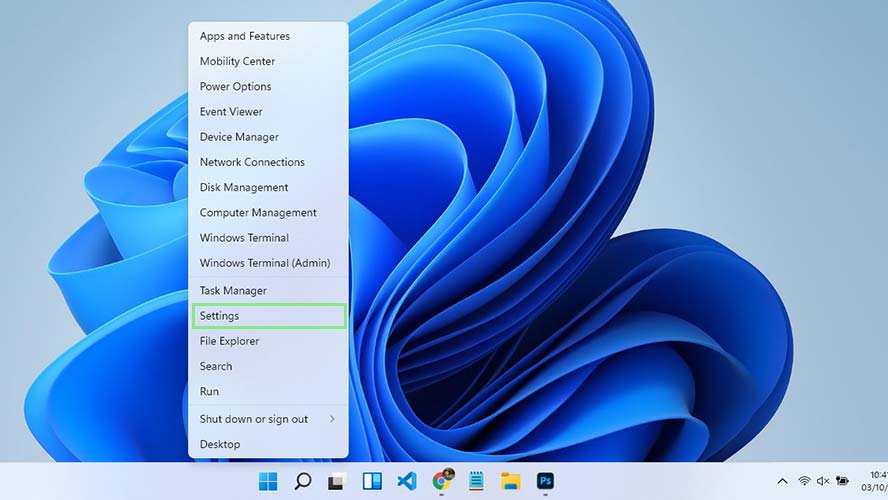
2) Next, select Settings from the options shown. This will open the Settings window for you.
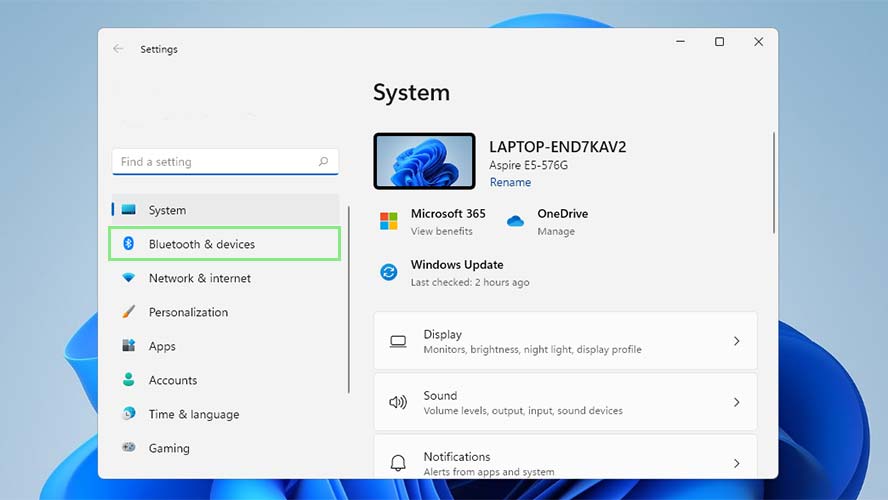
3) On the left navigation pane, select Bluetooth & devices.
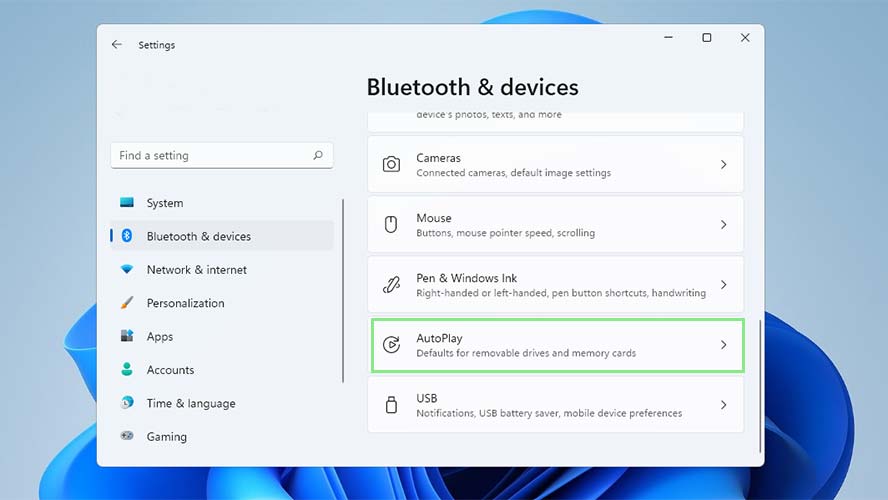
4) Scroll down to the bottom of the window and select AutoPlay from the options. After doing so, you should be able to access all settings for your Windows 11’s AutoPlay.
Sign up to receive The Snapshot, a free special dispatch from Laptop Mag, in your inbox.
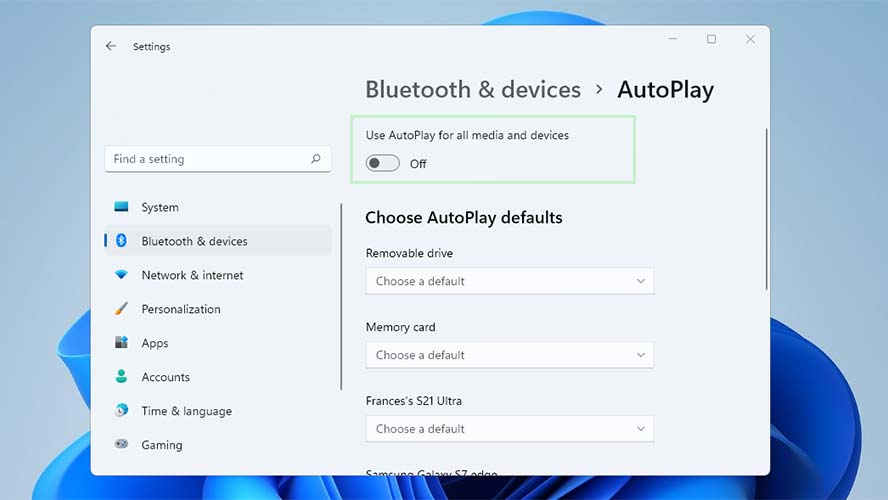
5) Turn Off the toggle button below the “Use AutoPlay for all media and devices” option. Congratulations, AutoPlay is now disabled for all devices that you will connect to your Windows computer.
Turning off Autoplay for specific devices on Windows 11
1) Open your Settings window by right-clicking the Start button on your taskbar and selecting Settings from the options shown.
2) Go to Bluetooth & devices settings by clicking it on the left navigation pane.
3) Select AutoPlay from the options. You can often find it near the bottom of the Bluetooth & devices settings.
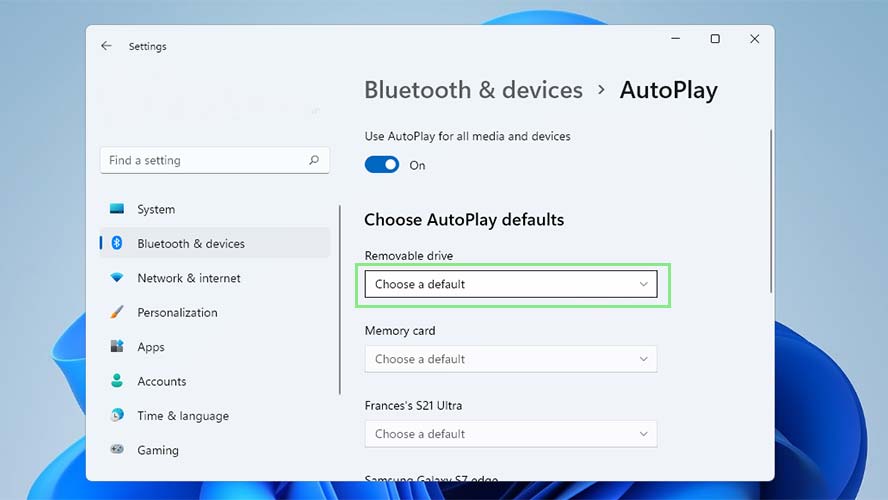
4) Look for the device your wish to disable AutoPlay for, and click on the dropdown below it.
5) Select “Take no action” from the options shown. By doing this, AutoPlay will not run for your selected device but run for all other devices where AutoPlay is turned on.
Bryan covers everything you need to know about Windows, social media, and the internet at large for Laptop Mag. Thanks to his extensive knowledge of operating systems and some of the most popular software out there, Bryan has written hundreds of helpful guides, including tips related to Windows 11 drivers, upgrading to a newer version of the OS, editing in Microsoft Photos, or rearranging pages in Google Docs.
