How to Disable the Safely Remove Hardware Feature on Windows 10
For ages we were told never to remove an external storage device without clicking on the ‘safely remove hardware’ notification. This is mostly still true, it’s never a good idea to just rip a USB drive out of its slot, for example. But it’s not something worthy of so much panic these days due to the Quick Removal option in Windows 10. This feature disables cache writing operations to the external storage device, making it necessary to stop a process before removing the device.
There aren’t many good reasons to disable it, but if you’re getting undesirable behavior from the ports or the things you connect to them, here’s how it’s done. It’s never a bad idea to start with the easiest fix when troubleshooting, after all.
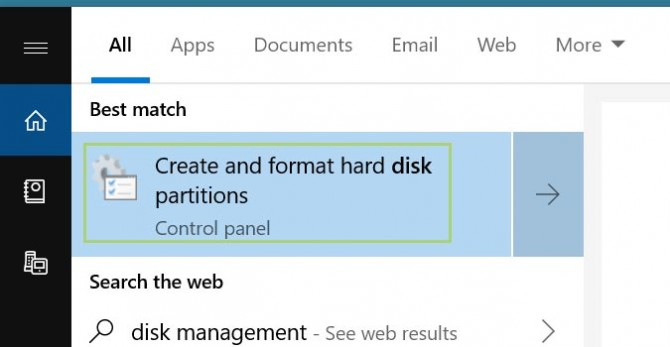
1. Type disk management in the search box on the Taskbar.
2. From the search options, select Create and format hard disk partitions.
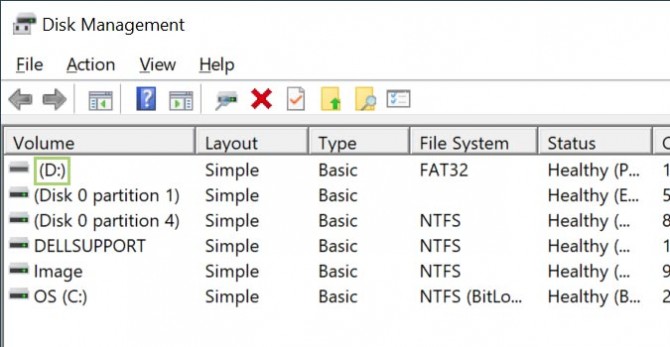
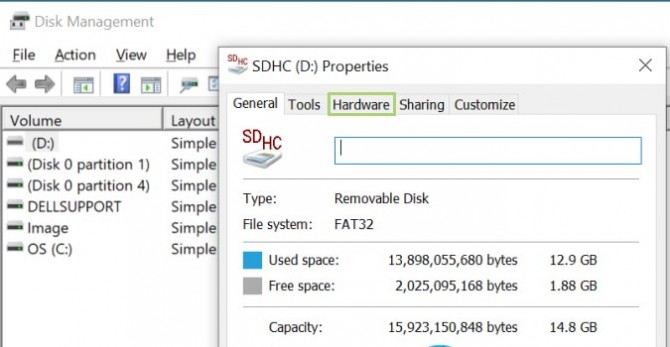
3. Right-click (D:), in this example, the external hard drive in the form of an SDHC card.
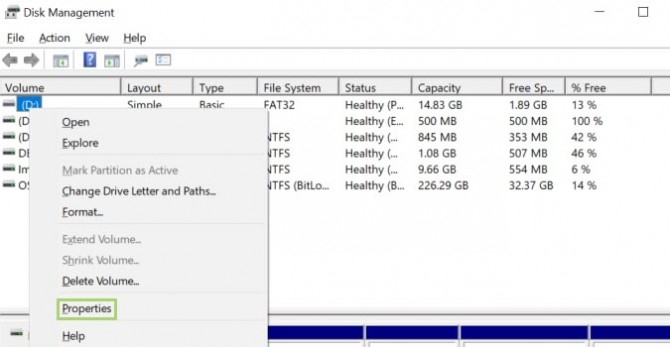
4. In the context menu, click Properties.
5. In the properties window that opens, go to the Hardware tab.
Sign up to receive The Snapshot, a free special dispatch from Laptop Mag, in your inbox.
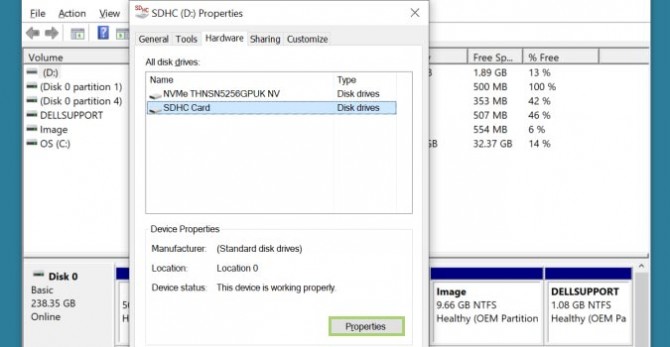
6. On the Hardware tab, with SDHC Card selected, click the Properties button.
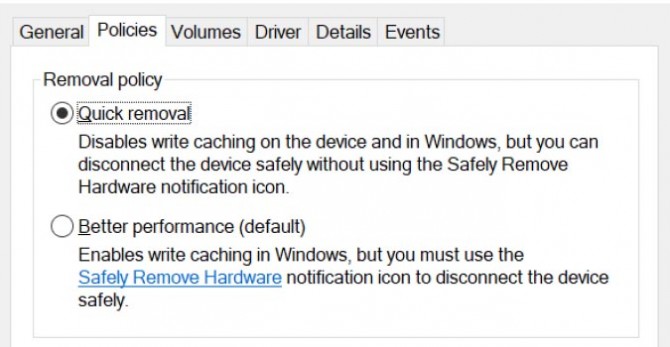
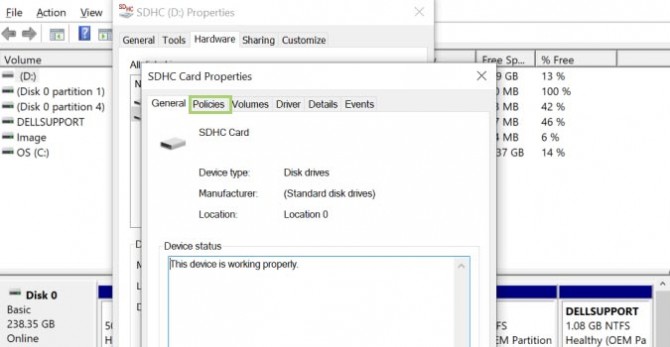
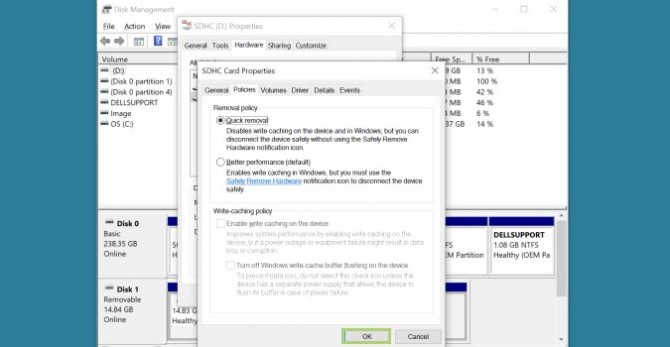
7. In the SDHC Card Properties window, go to the Policies tab.
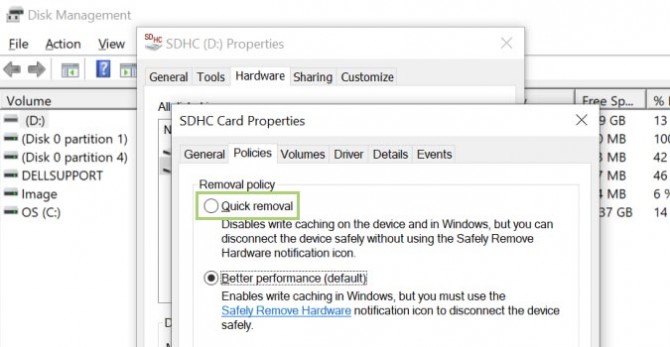
8. Select Quick removal, under Removal policy.
9. Click OK to apply the selection.
Credit: Microsoft
- Microsoft Laptops - Brand Review and Rating - Laptop Mag
- Microsoft Patches Critical Windows 10 Bug: Update Now
- Microsoft Edge's Collections Could Get Me to Ditch Chrome
Bryan covers everything you need to know about Windows, social media, and the internet at large for Laptop Mag. Thanks to his extensive knowledge of operating systems and some of the most popular software out there, Bryan has written hundreds of helpful guides, including tips related to Windows 11 drivers, upgrading to a newer version of the OS, editing in Microsoft Photos, or rearranging pages in Google Docs.
