How to Dual-Boot Windows 8 While Keeping Windows 7 As Your Default OS
Microsoft's upcoming Windows 8 operating system is available in beta "Consumer Preview" edition as a free download, but that doesn't mean you should stop using Windows 7 as your main OS just yet. Here's a simple way to install the new beta operating while making sure that your computer still boots into Windows 7 by default.
Download the Windows 8 ISO File
Though Microsoft provides an executable file that downloads Windows 8 for you as it runs, we recommend grabbing the entire 2 to 3GB ISO file from Microsoft's site. If your current version of Windows is 64-bit, grab the 64-bit version or 32-bit if that's what you have now. Also, make sure to write down the Product Key on Microsoft's site as you'll need it during the install.
Create and Install USB Drive or DVD
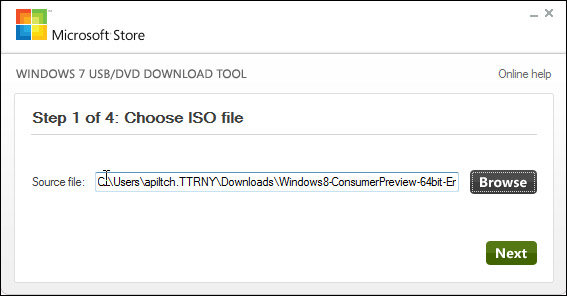
If your notebook has a DVD drive, it's easy enough to burn the ISO file to disc. However, many computers no longer have optical drives and many users no longer have blank DVDs lying around. You can turn any 4GB or larger USB flash drive into a Windows 8 install disk by using Microsoft's USB/DVD Download tool. Simply plug in a blank USB Flash Drive and launch the tool.
1. In the USB/DVD Download tool, choose the ISO file you downloaded and click next.
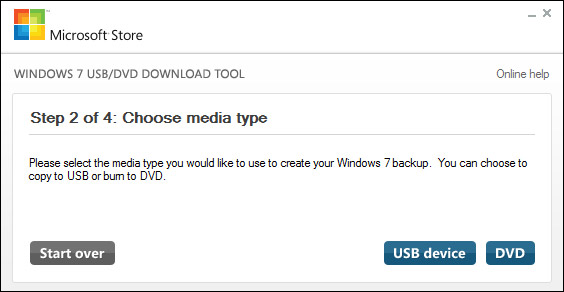
2. Click USB device.
Sign up to receive The Snapshot, a free special dispatch from Laptop Mag, in your inbox.
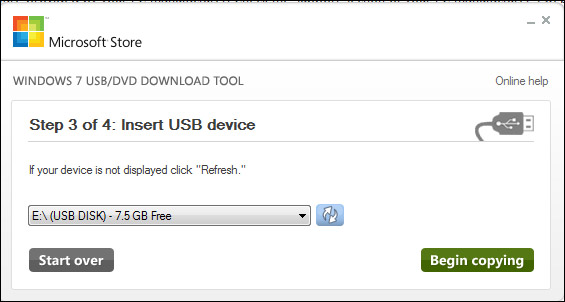
3. Select the drive letter of the USB driveyou wish to copy the install files to and click next.
After several minutes of copying files, your bootable Windows 8 USB install drive will be ready for use.
Create a Windows 8 Partition
In order for Windows 8 to dual boot with Windows 7 on the same computer, each operating system must be installed on a separate partition, with the Windows 8 partition taking up at least 20GB. If you're like most notebook users, chances are that your notebook's drive has only one usable partition, but fortunately you can create new ones.
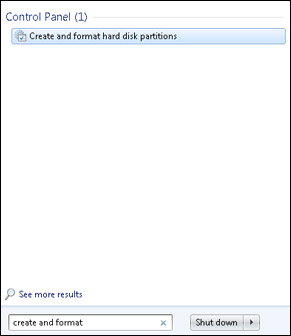
1. Type "Create and Format" into the Start menu search box and select Create and Format Hard Disk Partitions. The disk manager will launch.
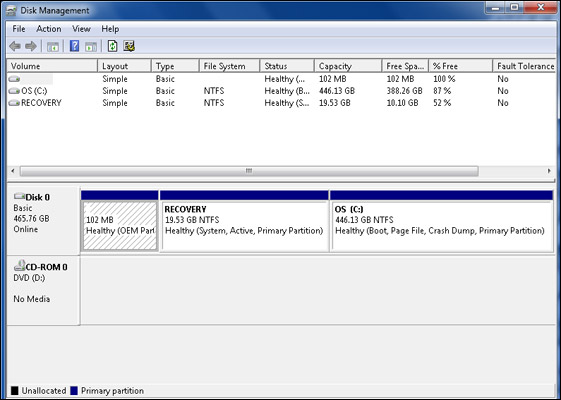
2. Examine the list of partitions on your hard drive, looking for secondary partitions you can use for Windows 8. Ignore recovery partitions and partitions that are smaller than 20GB and chances are that you'll need to shrink your main partition and create a new one. If you do find a secondary partition you can use, you can skip the following steps.
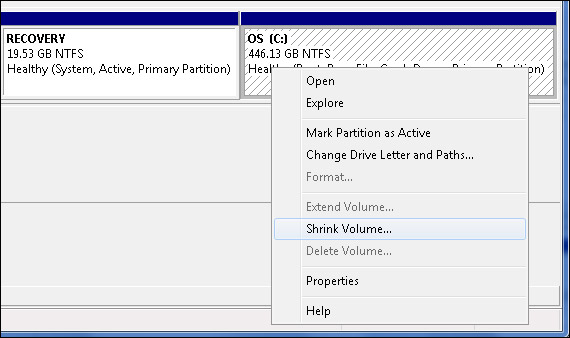
3. Right click on your main partition and select Shrink Volume. A dialog box appears which asks you how much space you'd like to shrink.
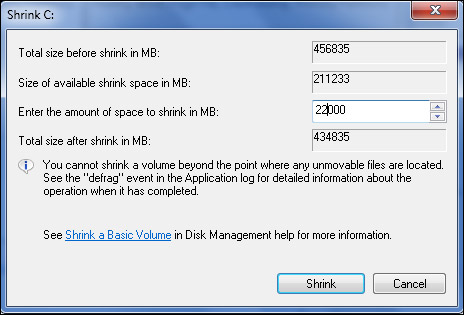
4. Enter at least 20,000 MB (20 GB) as the shrink size and click Shrink. If Windows doesn't allow you to enter 20,000 MB or higher, try clearing more free space on your drive. If you have more than 20,000 MB free on your patition but Windows still won't let you shrink to that size, download and use a third party partition resizer like Partition Wizard Home.
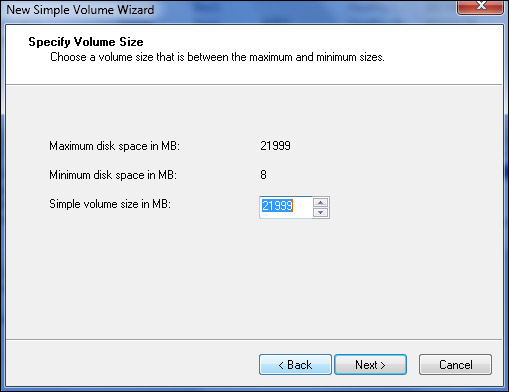
5. Right click in the unallocated partition then select New Simple Volume.
6. Create the volume with the maximum amount of available gigabytes. Select NTFS for the file format and name the volume something you can remember such as "win8."
Run the Installer
Installing Windows 8 onto your Windows 7 computer is pretty straightforward.
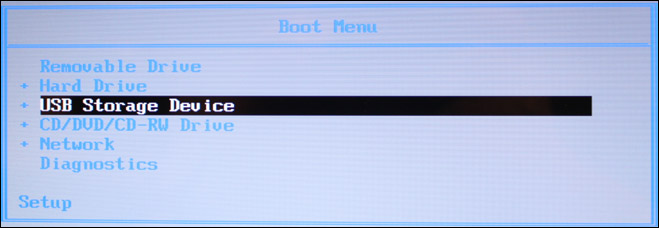
1. Boot off of your Windows 8 USB drive or DVD. Most PCs allow you to choose a boot device by hitting a function key when you power on.
2. Click Next then Install now.
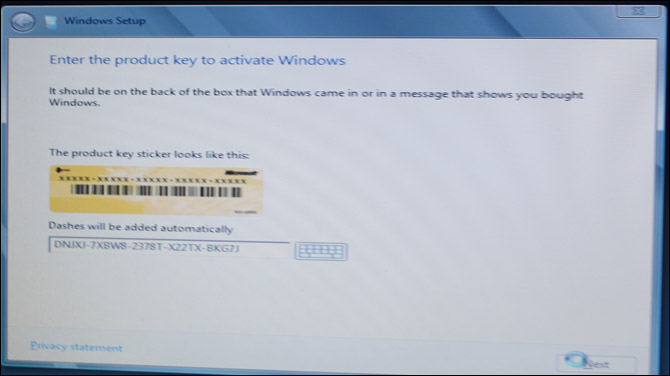
3. Enter your product key when prompted.
4. Accept the license terms and click Next.
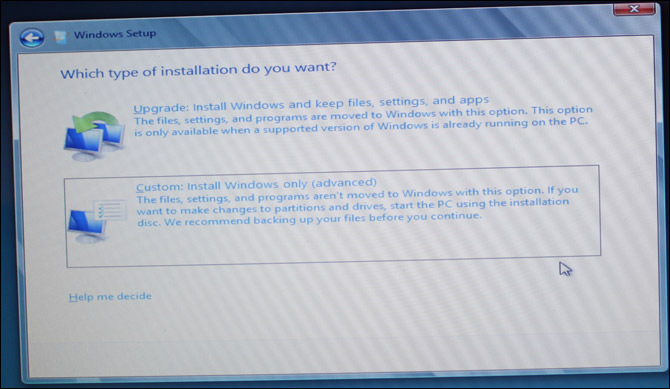
5. Select Custom install.
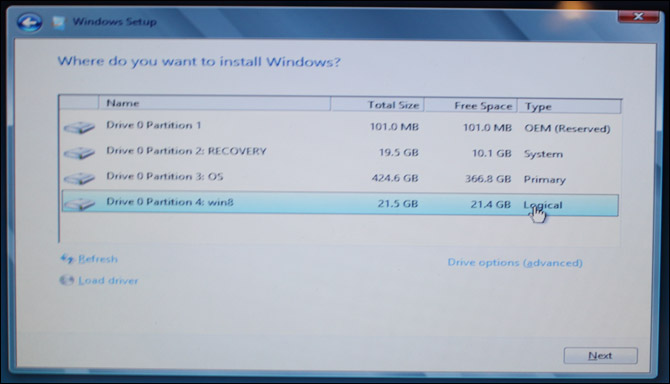
6. Select the empty partition you created or found. If none is shown, go back to Windows 7 and make sure you have a blank partition that's at least 20GB.
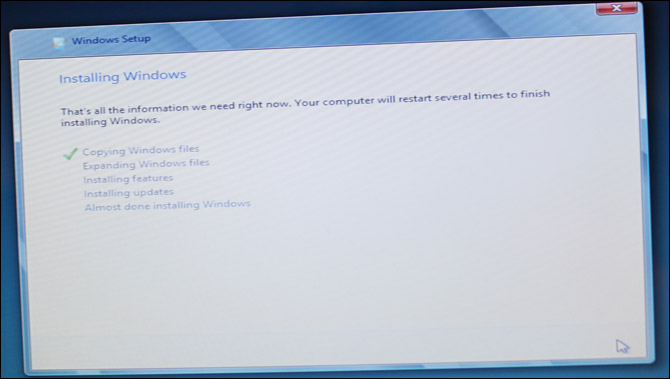
7. Wait patiently as Windows takes a few minutes to copy files and restarts itself a couple of times.
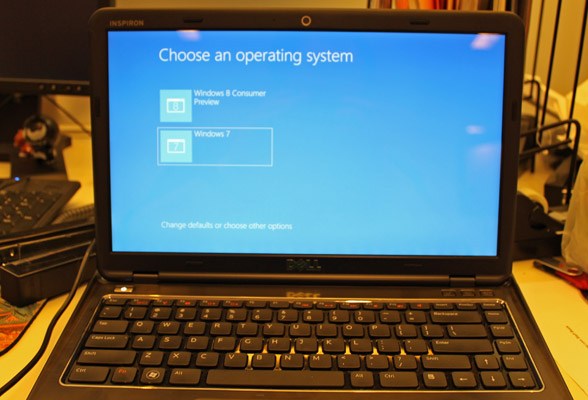
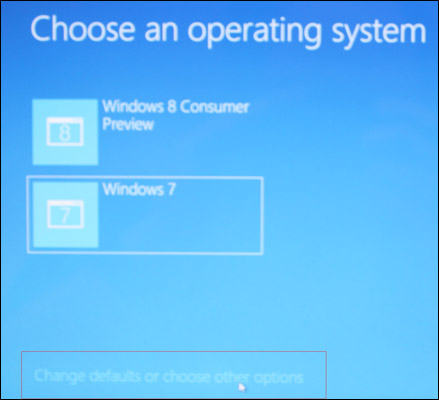
8. Click "Change defaults or choose other options" on the start screen that appears.
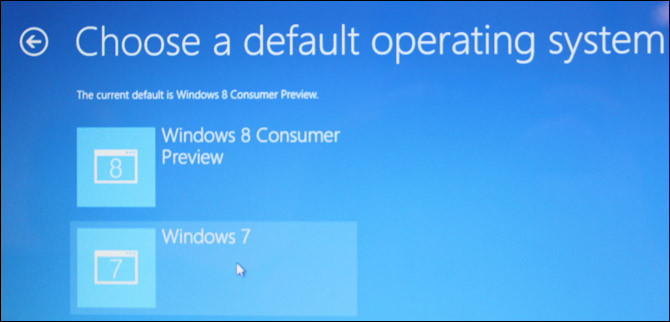
9. Select "Choose a default operating system." then Windows 7.
10. Change the timer if desired. If not changed, the system will boot to your default OS, which is now Windows 7, after 30 seconds of inactivity. You can lower that time for quicker, unattended boots.
11. Click Windows 8 Consumer Preview to boot Windows 8 and continue the installation process.
12. Give your PC a name (ex: DansPC) and background color. The name cannot have spaces or punctuation.
13. Pick your wireless or wired Internet connection and enter any appropriate passwords.
14. Select "Use express settings" to proceed more quickly.
15. Enter a valid email address that's associated with a Microsoft Windows Live account or use this opportunity to create a new account.Microsoft will also ask for your phone number so it can SMS message you if you lose your password.
Changing Your Default OS After Installation
If you want to change your default operating system after installing Windows 8, you can still do so whether you are working in either Windows 8 or 7.
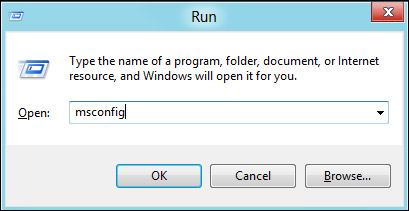
1. Hit Windows + R or type "run" in the search box. A dialog box appears.
2. Type msconfig and hit OK. The System Configuration application opens.
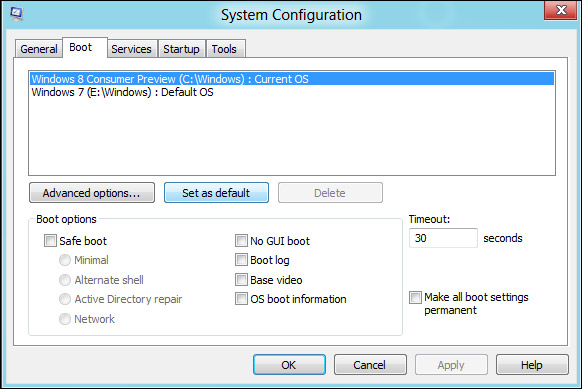
3. Click the Boot tab.
4. Select the OS you want as default and click Set as default. You can also set the default timeout.
5. Click Ok.

