
To uninstall Microsoft Teams completely, you need to uninstall Teams as well as the Teams Machine-Wide Installer. If you cannot find the installer in the list of programs in Windows Settings, you might need to use the Powershell script provided by Microsoft to remove all traces of MS Teams. If you do not completely remove the installer, it will keep reinstalling Teams every time your computer reboots or you login to your computer.
To remove via Windows Settings:
1) Type uninstall in the search box on the toolbar.
Article continues below 
2) Select Add or remove programs.

3) In the right pane of Apps Settings, type Team in the search box.

4) Right-click Teams to open the menu.

5) Click Uninstall.
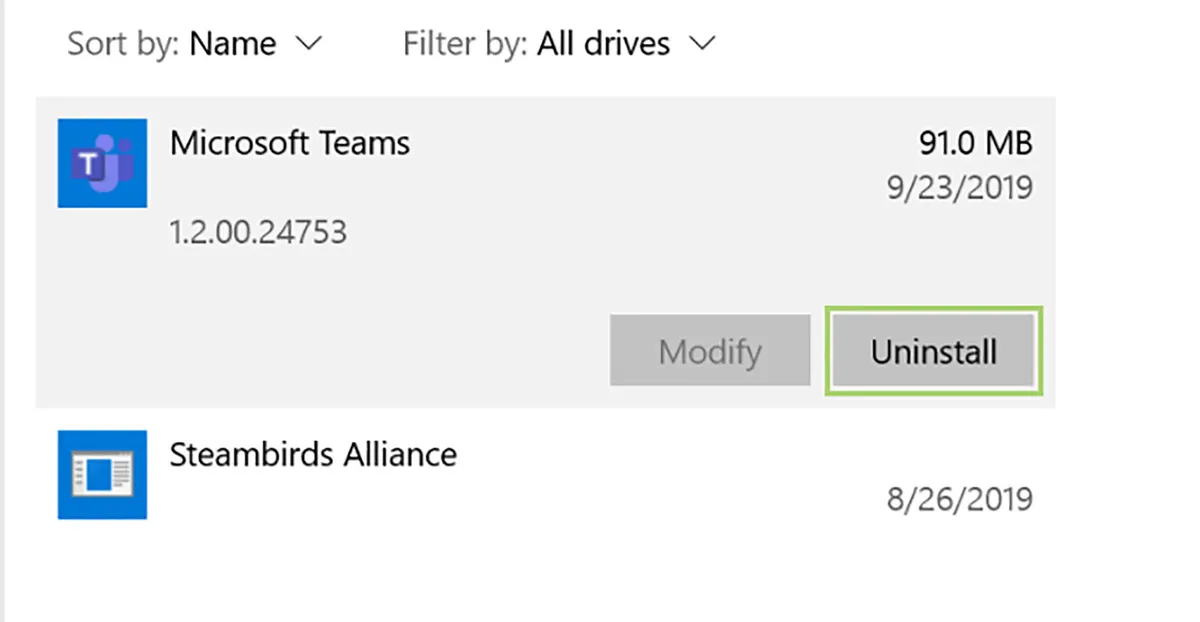
6) Click Uninstall one more time to confirm the action.

If you see Teams Machine-Wide Installer, remove it in the same way. If not, continue with the steps below.
To remove via Powershell script:
1) In a web broswer go to https://docs.microsoft.com/en-us/MicrosoftTeams/scripts/powershell-script-teams-deployment-clean-up .

2) Click copy, to copy the code.

3) To open Powershell, type powershell in the search box on the toolbar.
4) Select Windows Powershell in the search options.

5) In the Powershell window, paste the code you previously copied.

6) Press Enter to run the code. All the remnants of MS Teams will now be removed.

