Mobile phones these days have some great camera technology. As image resolution continues to improve as phone cameras increase megapixel sizes, image size follows suit. This leads to snapping a lot of images without much thought that take up ever-increasing amounts of our device and cloud storage.
- MacBook Air vs. MacBook Pro: Which is best?
- macOS Big Sur review
To combat this, you can always reduce the size of your photos. At first glance, this doesn't seem to be an appealing option. Why would anyone take a photo in high quality and then make it worse? Well, you should ask yourself how many photos you're printing these days as opposed to using solely on social media. If most of your photos are for Facebook, Instagram, or Snapchat, you really don't need the extra resolution — especially considering these social networks reduce the sizes of your images anyway to save on storage costs.
For print, we'd want a high quality image at 300 PPI. For social media, 72 PPI is often more than enough. Weigh the pros and cons, and if you can live with a decreased image size, here's how to shrink them using built-in tools on your Mac.
Article continues below
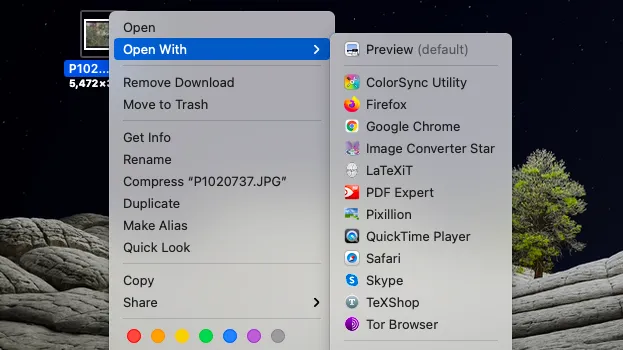
1) Right-click on the image you want to reduce the size for.

2) In the menu that opens, click Open with.

3) Select Preview, to open the image in Preview.

4) In Preview, open the Tools menu.

5) In the Tools menu, click Adjust Size.

6) In the dialogue box that opens, change the resolution.

7) Click OK to confirm the changes.
