How to Customize the Subtitles in VLC Player
The VLC media player is an open source platform-neutral application that allows you to play videos in a variety of formats. If your video has subtitles, the default settings make sure that the text is readable in most scenarios for most individuals. There may be cases, however, where the subtitles don’t work well with the video they’re attached to -- dark colored text, for example, on a movie that’s dark a lot of the time.
Luckily, there’s a little-used feature that allows you to change this, as well as the size, background, and other subtitle settings.
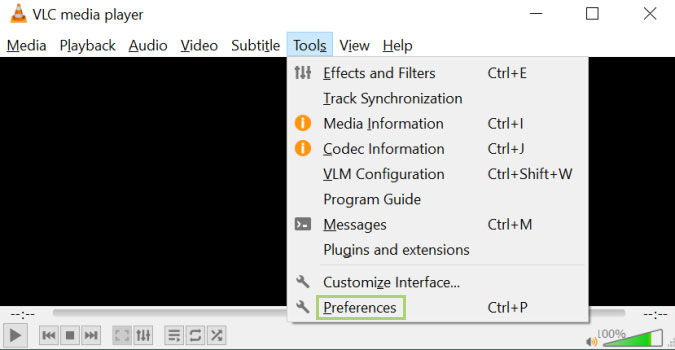
1. In the VLC media player window, click Tools.
2. Select Preferences in the Tools menu.
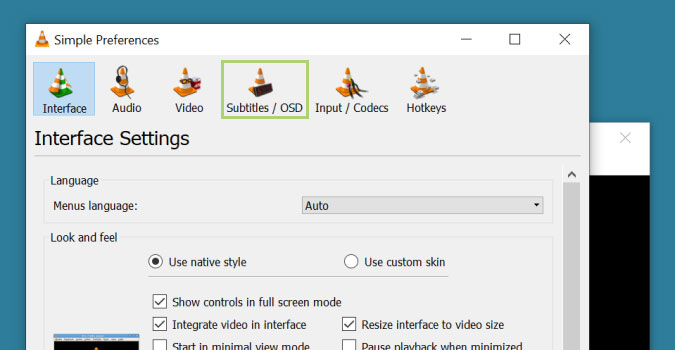
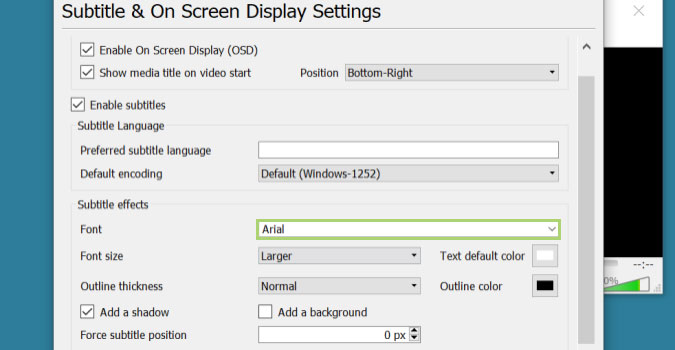
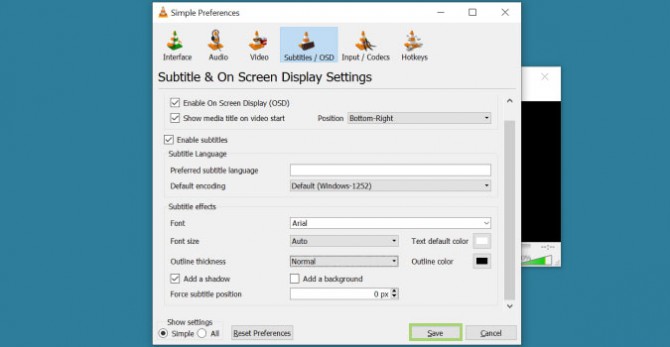
3. Go to the Subtitles / OSD tab to access all the available preferences.
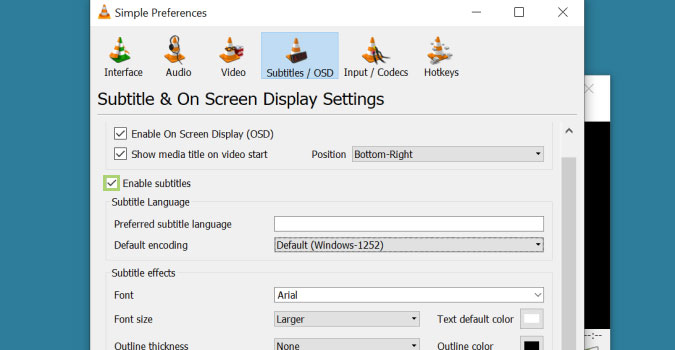
4. Check that the Enable subtitles checkbox is selected.
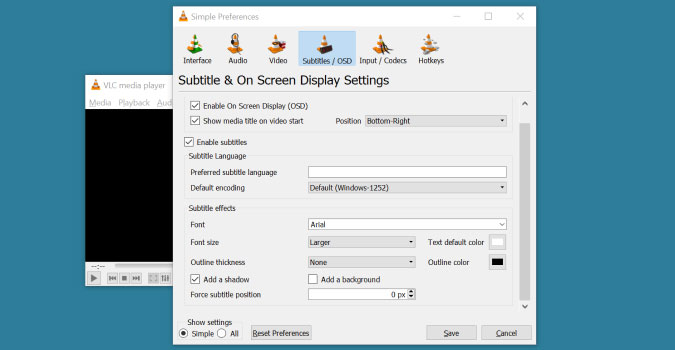
5. If you prefer a particular font, click on the Font drop-down menu and select a Font other than the default Arial font.
Sign up to receive The Snapshot, a free special dispatch from Laptop Mag, in your inbox.
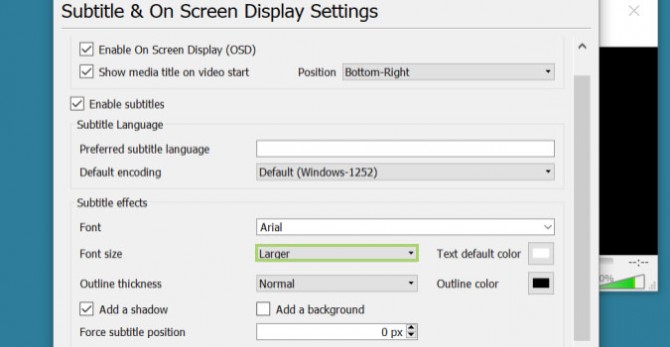
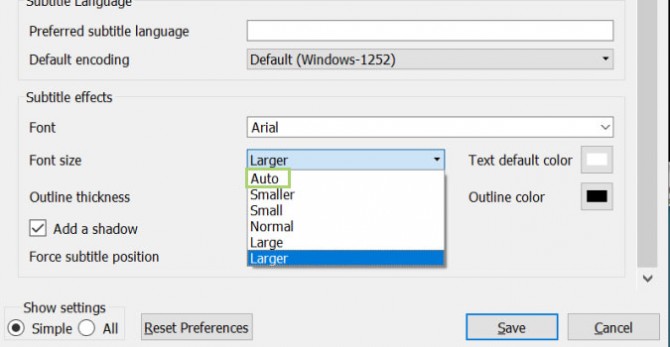
6. Click on the Font size drop-down menu to see the available options.
7. Select Auto from the drop-down menu. This option automatically resizes the font based on the VLC window size. If you always watch a video in full screen mode on a big screen, you may want to keep the default.
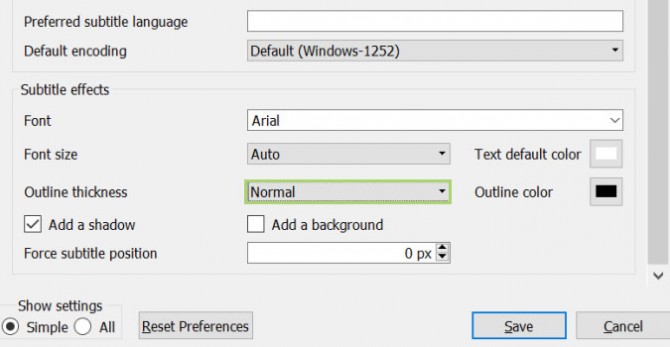
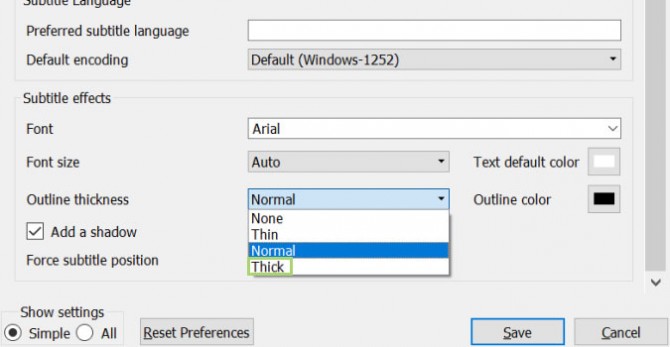
8. If the current subtitles are not easily readable, click on the Outline thickness drop-down menu to change the default.
9. Select Thick from the drop-down menu if you need more readability.
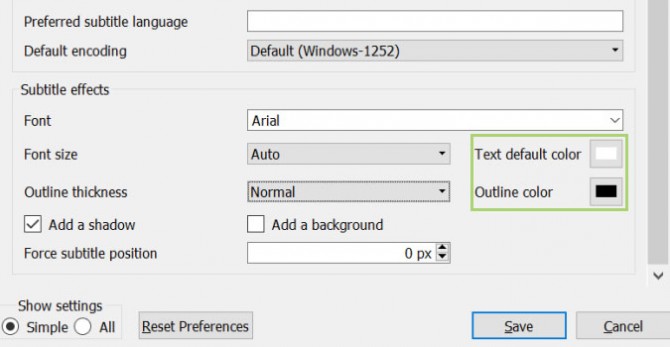
10. Click on the color tiles to choose colors other than the default white and black for the text and the outline. The default colors, however, are readable on most backgrounds.
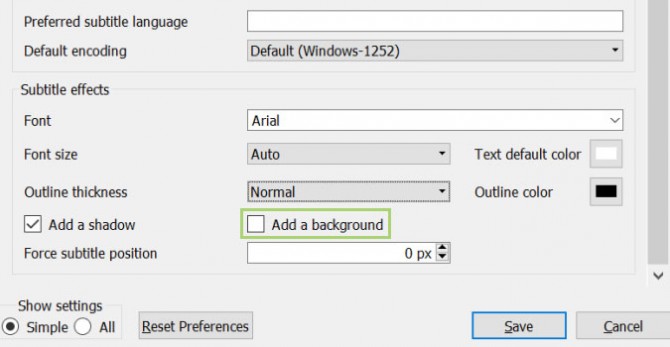
11. If you can’t see the color of the subtitles against the video background, add a checkmark against Add a background option. This will add a solid color background to the subtitles.
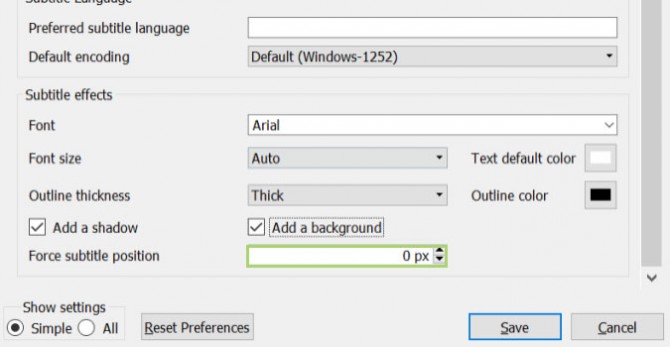
12. If you would like the subtitles to be in a specific position other than the alignment options offered, add a number to the Force subtitle position textbox. This position will not change based on the size of the VLC player window.
13. When you are done checking and updating the preferences, click Save.
Credit: Microsoft
- The Best Free Video Editing Software | Tom's Guide
- Best Video Editing Laptops (Including Models With 4K
- The Best Cheap Video Editing Software | Tom's Guide
Bryan covers everything you need to know about Windows, social media, and the internet at large for Laptop Mag. Thanks to his extensive knowledge of operating systems and some of the most popular software out there, Bryan has written hundreds of helpful guides, including tips related to Windows 11 drivers, upgrading to a newer version of the OS, editing in Microsoft Photos, or rearranging pages in Google Docs.
