How to Use Right-Click in macOS
One of the most deeply ingrained practices of a PC user is the right-click. Unfortunately for the neophyte Mac convert, Macs don't use a right-click -- at least not in the way that PC users have come to expect. Moreover, secondary-clicking is disabled on Macs by default. Thankfully, setting this up is a simple affair. Here are three ways to right-click on a Mac:
1. Hold the Control key while clicking on the trackpad. While this method requires two hands where the others require only one, holding down the Control key while tapping on the trackpad is a foolproof way to open the right-click options menu, and it doesn't require you to dig into the system preferences menu.
2. Assign the bottom right or left corner of the clickpad as a right click. Some PC traditionalists will undoubtedly become frustrated as they instinctively click the bottom corner of the trackpad when trying to open the right-click options menu. Thankfully, Apple has made it possible to keep those instincts alive: You can assign the bottom right or bottom left corner of the trackpad as a right-click function. Here's a step-by-step guide to setting it up.
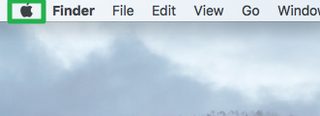
1. Click the Apple logo in the top left corner of the screen.

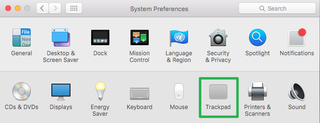
2. Select System Preferences from the drop-down menu.

3. Select Trackpad.

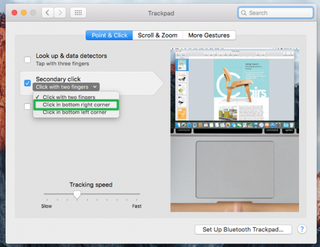
4. Check the box next to Secondary Click to enable right-clicking.
Stay in the know with Laptop Mag
Get our in-depth reviews, helpful tips, great deals, and the biggest news stories delivered to your inbox.

5. Select "Click in the bottom right corner" from the drop-down menu just beneath Secondary Click. Alternatively, select "Click in the bottom left corner" if you use your left hand to navigate.

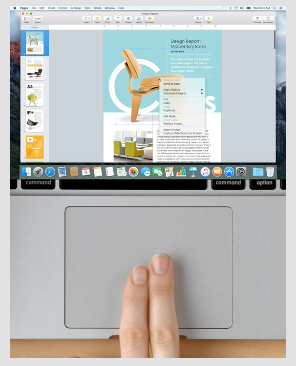
Click on the trackpad using two fingers. This is probably the easiest of the three methods. Setting up two-finger clicking follows the same procedure as above, with one exception: In the drop-down menu beneath Secondary Click, select "Click or tap with two fingers."

PC to Mac Guide: How to Make the Switch
- How to Use Keyboard Shortcuts in OS X
- Eject USB Devices in OS X
- How to Use Gestures to Navigate OS X
- How to Right Click in OS X
- Install Apps in OS X
- How to Find Files and Folders in OS X
- Take Screenshots in OS X
- Make Desktop Shortcuts in Mac OS X
- How to Browse Your Applications in OS X
- How to Force Close Frozen Applications in OS X
- Quit Applications in OS X
- How to Use Full Screen Apps in OS X
- Use Spotlight to Find Files in OS X
- Create an Apple ID
- Move Your PC files to a Mac
- How to set up Mail and Calendar accounts on OS X
- Use OS X El Capitan's Split Screen Mode
- Increase the Text Size on Mac
