How to Enable Parental Controls on the Amazon Kindle Fire HD

Making sure your kids don't view any inappropriate material on your tablet can be difficult. Between the web, movies, games, music and books, there are limitless opportunities for kids to see things they shouldn't. That's why both Amazon's Kindle Fire HD 7-inch and Kindle Fire HD 8.9-inch come loaded a wide array of parental controls settings. Here's how to ensure your child isn't playing with fire when they're playing with your Fire.
Enabling Parental Controls
Amazon has made the Kindle Fire HD's parental controls extremely user-friendly. In fact, all of the tablet's basic parental controls can be switched on or off from a single screen. To enable parental controls:
1. Swipe down from the top of the screen to bring up the notification bar and tap More.
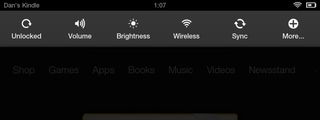
2. Press Parental Controls and create a Parental Controls Password of at least four characters.

3. Tap the On button on the right side of the screen next to the Parental Controls line, and the controls will be activated.

Blocking Content
Stay in the know with Laptop Mag
Get our in-depth reviews, helpful tips, great deals, and the biggest news stories delivered to your inbox.
From the Parental Controls menu, you can enable and disable any number of parental settings. Say for example, you don't want your kids watching a movie you recently downloaded or listening to a new album. Amazon's got you covered. To restrict content:
1. Open the Parental Controls menu and enter your password.

2. Select Block and Unblock Content Types and choose the content you want to block.

To block the Newsstand, for example, press Unblocked on the Newsstand line. When it says Blocked, the newsstand will automatically be blocked whenever the Parental Controls are enabled. Reverse the steps to enable the Newsstand.

Creating a FreeTime Profile
Beyond standard parental controls, Amazon also gives parents the opportunity to control how long their kids can use the Kindle Fire HD thanks to the company's Kindle FreeTime app. The software, which is available through a download and features its own kid-friendly interface, allows parents to set up profiles for their children and assign each their own usage time limits, give them access rights to content and more.
In order to enable FreeTime you'll first have to create a profile for your child. To create a profile:
1. Connect to the Web and Update your Kindle Fire HD to the latest system version.

2. Open FreeTime and create a password.

3. Tap the Select a Photo box to add an avatar to the profile.
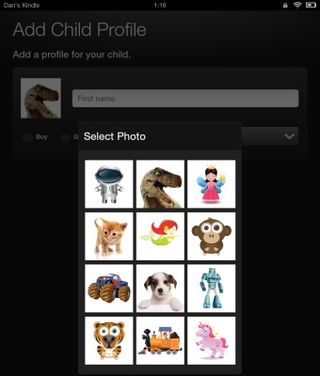
4. Enter your child's name in the text box, select their gender and birthday and tap Next at the bottomof the screen.
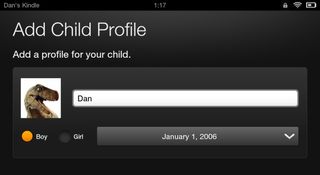
Your child's profile will now be created. Once the profile is created, you can open FreeTime and tap your child's profile image to put the Kindle Fire HD in FreeTime mode.
Managing Content in FreeTime
With your child's profile created, you can now enable or disable individual settings. To manage your child's profile:
1. Open FreeTime and select Manage Child Profiles.

2. Choose the profile you want to edit and tap Manage Your Content.
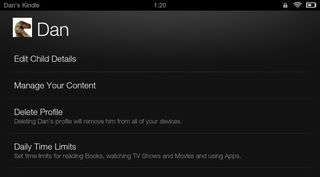
3. Select the books, videos or apps you want to make accessible to your child and tap Save at the bottom of the screen. The selected content will now be visible in your child's profile when FreeTime is active.

Setting Usage Limits in FreeTime
FreeTime also allows parents to limit the amount of time their kids can use the Kindle Fire HD. To set up time limits:
1. Open FreeTime and select Manage Child Profiles.

2. Choose Daily Time Limits and tap the On button.

3. Press Total Screen Time and move the slider to the appropriate amount of time you want your child to use the Kindle.
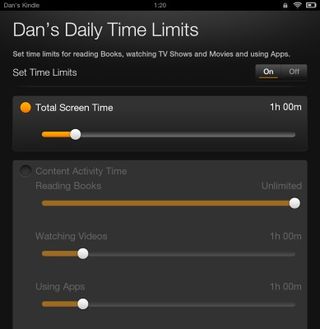
4. For individual content types, select Content Activity Time and set the amount of time you want your child to be able to read books, watch videos or use apps.

5. Tap the back arrow, and your settings will be saved.
If you followed each of the above steps and remember to set keep the parental controls switched on, and FreeTime is active, you can rest easy knowing that your child will be safe while using your Kindle Fire HD.

