12 Dumbest PC Default Settings (and How to Change Them)
If you bought a new car that came with the seat tilted all the way back, the air conditioner going at full blast in the winter and the radio volume turned down to inaudible levels, you'd immediately make adjustments. Unfortunately, most PC users don't change the default settings in their operating system or other popular software. Programmers know this and often configure the defaults to protect users, distract them with unnecessary bling or push a business agenda.
Fortunately, when you know what to change, you can take control of your computer. Here are the 12 dumbest default PC settings and how to change them.
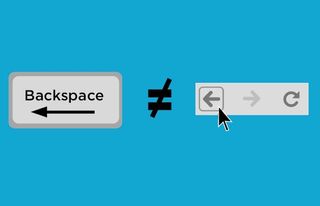
Backspace key in browsers erases work
Imagine if the Enter key on your keyboard doubled as an instant-wipe key that would erase your hard drive if you hit it under the wrong circumstances. The rocket scientists who developed all four major desktop browsers have made a similar choice by setting the Backspace key to double as a browser Back button when you aren't focused on a text field. So, if you're writing something in a Web form and hit Backspace when the cursor isn't in the right box, the browser will return to the previous page, erasing your work. Fortunately, you can disable Backspace as Back button in Chrome with an extension called BackStop and in Firefox with the backspace_action setting. However, if you're using Internet Explorer or Safari, you'll just have to be extra careful.
More: How to Disable Backspace as Back Button in Chrome and Firefox
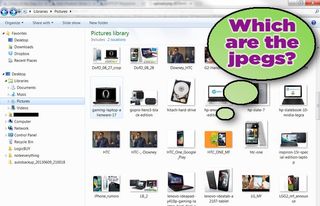
File extensions hidden from user
Everyone knows that computers determine file type by the two- to four-character extension at the end of a file name. For example, if someone sends you a document and you see that it's named myreport.docx, you know that this a Word document likely made with Office 2007 or later. However, big daddy Microsoft doesn't want you to worry your little head about such details, so it hides most file extensions by default in Windows. Fortunately, you can see all the extensions by simply unchecking "Hide extensions for known file types" in Folder Options.
More: How to Show File Extensions in Windows
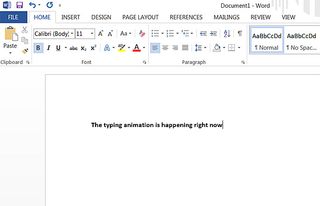
Microsoft Office 2013's annoying typing animation
Talk about placing style over substance. When you type in any Office 2013 application, the text slides in under the cursor in a manner that's distracting at best and nauseating at worst. Touch typists who can do 85 to 90 wpm without breaking a sweat will find this feature makes them seasick and will notice that the feature is always half a second behind them. Fortunately, you can get rid of the Office 2013 typing animation by creating a key called Graphics under the HKEY_CURRENT_USER\Software\Microsoft\Office\15.0\Common registry key and then adding a DWORD value named DisableAnimations with a value of 1.
Stay in the know with Laptop Mag
Get our in-depth reviews, helpful tips, great deals, and the biggest news stories delivered to your inbox.
More: How to Disable the Office 2013 Typing Animation

Browser needlessly loads a home page
The "home page" feature in your browser harks back to an earlier time when launching your browser for the first time each day was like opening the morning paper over breakfast. You'd stare at the headlines on Yahoo, MSN or whatever site your browser had been set to load first, read a little news and then head off to other places on the Internet. However, today, we're opening new browser windows every few minutes, and the browser's home page that opens with each one is wasting our time and bandwidth. To set your home page to be blank in IE, you can navigate to about:blank and click the Use Current button in Settings. In Firefox, you can specifically choose "Show a blank page" in the Options menu, while Chrome shows you a blank tab by default.
More: How to Set a Blank Home Page in IE, Firefox and Chrome
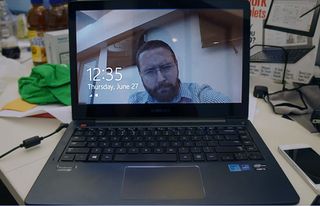
Windows 8 lock screen slows you down
Every click you make sucks precious milliseconds from your day and brings you one step closer to RSI. So why on Earth does Microsoft force you to click or drag away the unnecessary lock screen in Windows 8 / 8.1, even if you have a laptop or desktop PC? Fortunately, you can force Windows to boot or unlock straight to the password prompt by editing a simple registry key. Simply create a new DWORD value named NoLockScreen under the HKEY_LOCAL_MACHINE\SOFTWARE\Policies\Microsoft\Windows\Personalization registry key, and give it a value of 1.
More: How to Eliminate the Time-Wasting Lock Screen in Windows 8
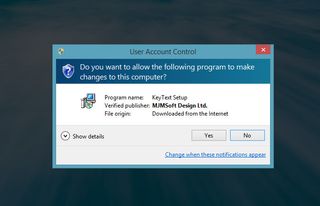
Annoying user account control warnings
"It's all fun and games until someone loses an eye." "Don't run down the stairs, or you'll break your neck." As if our real parents didn't have enough warnings for us, Microsoft has decided to treat Windows users like toddlers by asking, "Do you want to allow the following program to make changes to this computer?" after we've double-clicked on an install file. Fortunately, you can silence these bossy warnings by disabling User Account Control in the Windows Action Center.
More: How to Make Windows 8 Look More Like Windows 9
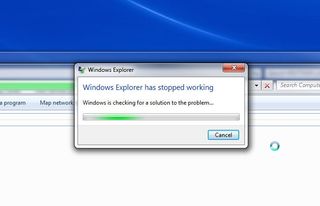
Windows reports all errors to Microsoft
As if giving you nagging warnings weren't bad enough, Windows also tattletales to the Microsoft corporate servers every time an app crashes. When a program locks up, rather than crashing gracefully, Windows 7, 8 or 8.1 spends several seconds "searching for a solution" from Microsoft before it finally gives up and closes. If your program's going to crash, chances are that Microsoft can't help you, and you need to either restart the program and hope it was a one-time thing or find the source of the error on your own. To disable Windows Error Reporting, just go to the Action Center, click Change Action Center Settings, Problem Reporting Settings and "Never check for solutions."
More: Disable Error Reporting in Windows 8.1, Windows 8 or Windows 7
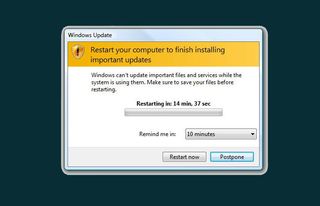
Windows Update automatically reboots
Microsoft wants you to install regular updates so much that it sets Windows to automatically download these updates in the background. Unfortunately, the operating system isn't very patient when it's time to install those patches, popping up a dialog box that warns you that you must either reboot now or postpone it for 10 or more minutes. However, if you've walked away from your computer and don't hit the Postpone button in time, Windows will restart itself without your permission. You can disable auto-restart in Windows 7, 8 or 8.1 by adding a registry key called WindowsUpdate and another underneath it named AU under the HKEY_LOCAL_MACHINE/SOFTWARE/Policies/Microsoft/Windows key and adding a DWORD value to it called "NoAutoRebootWithLoggedOnUsers" and setting that value to 1.
More: How to Disable Automatic Restart in Windows 8.1, Windows 8 or Windows 7
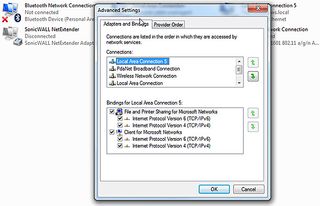
Network settings prioritizes connections for you
You're sitting in the conference room at work, using the weak office Wi-Fi during a meeting. Then, you go to your desk and plug in to the speedy Ethernet connection, but your laptop is still using the Wi-Fi network for Internet. To get your best connection, you can hit disconnect on all your wireless connections until the Ethernet takes over, or you can change Windows' messed-up network preferences. To change the order in which Windows connects to available networks, click Change Adapter Settings in the Network and Sharing section of the Control Panel. Hit the Alt key, and select Advanced Settings from the Advanced menu. You can then rank connections from most to least important using the up and down arrows. We recommend putting your Ethernet connection on top.
More: How to Change The Connection Priority in Windows 8.1, Windows 8 or Windows 7
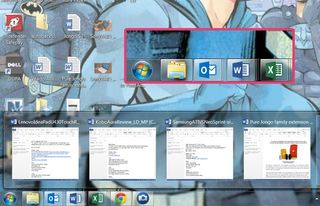
Windows groups application windows into one icon
Want to know how many Internet Explorer windows you have open right now? You won't find out by looking at the taskbar because, by default, Windows 7, 8 and 8.1 group all the open windows for an individual program into just one icon on the taskbar. You could have five different Word docs open but only see one ambiguous W icon at the bottom of your screen. Fortunately, you can make each window get its own taskbar icon by right clicking an empty space on the taskbar, selecting Properties, navigating to the taskbar tab and then choosing Never Combine under Taskbar Buttons.
More: 11 Ways to Boost Battery Life on Your Windows 7 Laptop

Word converts quotes to smart quotes.
In ancient times, people used electric typewriters, which had both open- and close-quote keys that slanted in or out to show the beginning or end of a quotation. However, in the 21st century, curly quotes cause all kinds of problems when entered into Web forms, used in HTML or otherwise appropriated for online use. Unfortunately, Microsoft still doesn't get it, automatically turning all quotes into "smart" quotes, which can wreak havoc when copied and pasted into other applications. To disable smart quotes in Word 2013, select Options from the File menu, click Proofing and hit the AutoCorrect Options button. Uncheck the "Straight quotes with curly quotes option" under the AutoFormat tab.
More: How to Disable Smart Quotes in Word 2013 or Word 2010
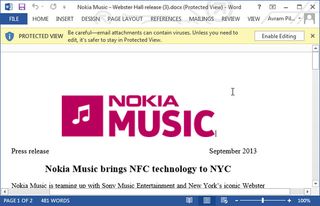
Word Protected View stops you from editing attachments
Your business partner emails you a .docx file. You open it, intending to make a few changes, and then realize that you can't make changes to the document because Word opened it in Protected View, where you can see but not edit the content. As usual, Microsoft is protecting you from yourself, on the off chance that you've opened a Word document with a macro virus in it. There's an Enable Editing button at the top of the screen that will let you edit, but you shouldn't even have to click that. To open all Word 2013 documents in editing mode from now on, select Options from the File menu, select Trust Center and click Trust Center Settings. Select Protected View, uncheck all three options and click OK.
More: How to Disable Protected View in Microsoft Word 2013 and Word 2010

