How to Configure Microsoft Word's Spell Check and Autocorrect
Microsoft Word can helpfully correct or point out spelling errors and other errors as you type. But when you've purposely typed a word a certain way, those squiggly red lines and autocorrections are just annoying. Adjust Word's autocorrection settings and spellcheck dictionary to avoid this frustration for your most commonly typed words.
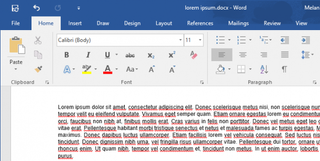
With the steps below, you'll add exceptions to Word's autocorrection rules so it won't automatically change specific words you type based on rules like always capitalizing the first word of a sentence. You'll also add words to the custom dictionary so Word will stop flagging them as misspelled.
How to Add Exceptions to Word's Auto-Correction Rules
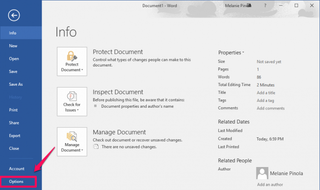
1. Click File then Options in the left menu.
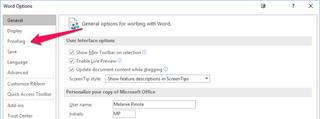
2. Click Proofing in the Word options window.
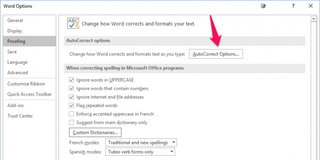
3. Click the AutoCorrect Options button.
4. Click the Exceptions button. You can also uncheck any of the auto-correction defaults here, such as always capitalizing the first letter of a word in a table cell.
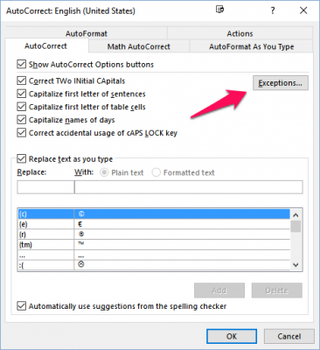
5. Click the tab of the type of auto-correction you want to add an exception to. For example, if you work for a company that always writes its name in lowercase, click the First Letter tab so Word won't capitalize it when you write the company name at the start of a sentence. The Initial Caps tab will stop Word from correcting words with two capital letters at the beginning. Use the "Other Corrections" tab for all other words.
Stay in the know with Laptop Mag
Get our in-depth reviews, helpful tips, great deals, and the biggest news stories delivered to your inbox.
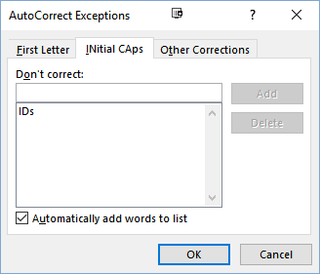
6. Add the word you don't want corrected and click OK.
How to Add Words to the Custom Dictionary
1. Click on the Custom Dictionary button in the Word options window.
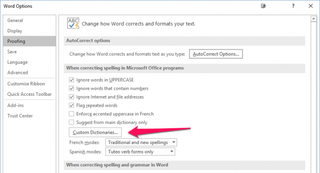
2. Select CUSTOM.DIC then click the Edit Word List button.
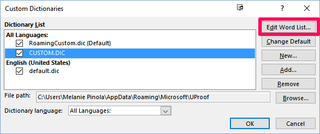
3. Add each word you don't want marked as misspelled and click OK.
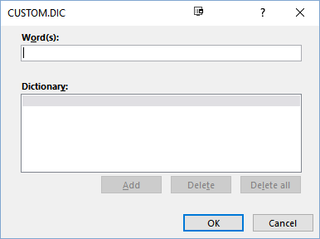
4. Click OK to close the Word options window.
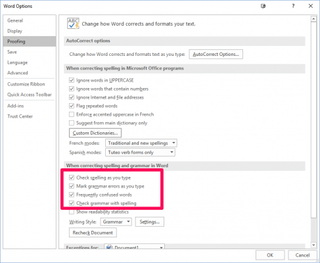
You can also turn off spellcheck and grammar check altogether in the Word options menu, but proceed at your own risk!
Microsoft Word Tips
- Show Formatting Marks in Microsoft Word
- See All of Microsoft Word's Keyboard Shortcuts
- Select All Text with Similar Formatting in Microsoft Word
- Create Table Templates in Microsoft Word
- Use Microsoft Office's Lorem Ipsum (Random Text) Generator
- Add a Table of Contents in Word
- Co-Edit a Document in Word
- Add or Remove Page Breaks in Word
- Put Microsoft Office into Touch-Friendly Mode
- Compare Docs Side-by-Side
- Remove Double Spaces After a Period
- Compare and Combine Two Docs
- Copy and Paste Text from Multiple Locations
